
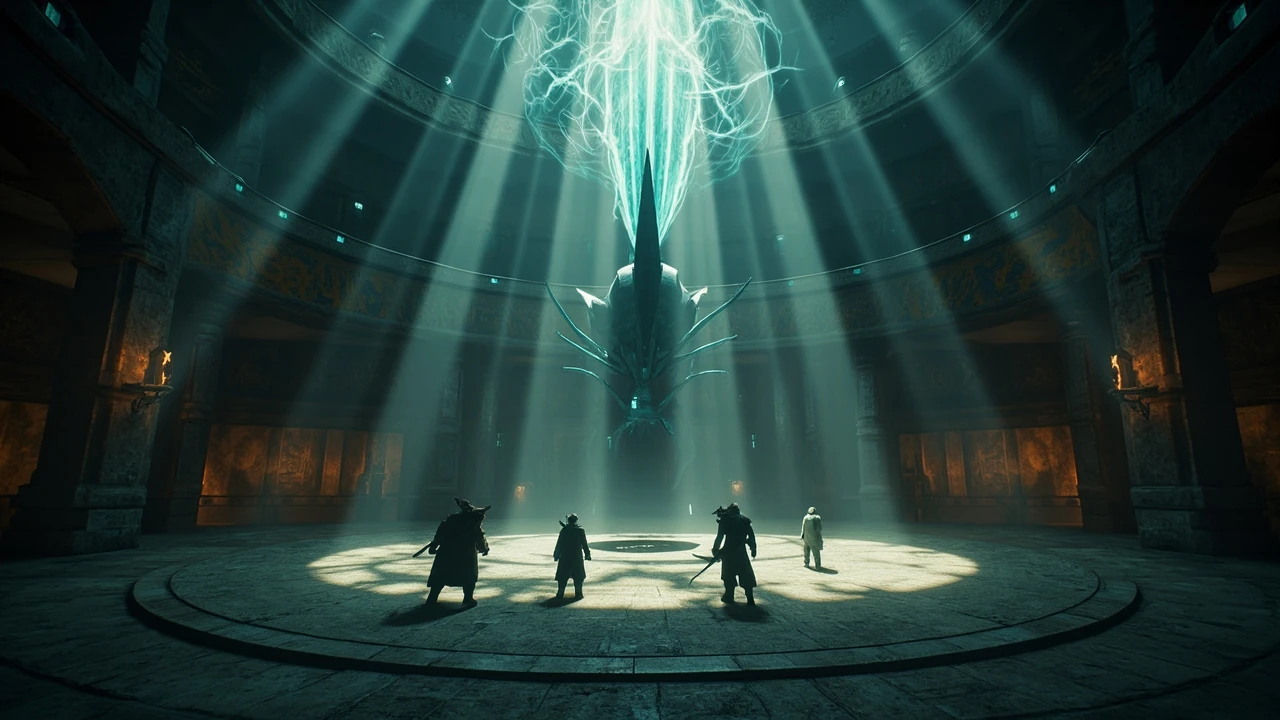
Endless Tower Expedition 33: a strategy walkthrough for all 33 floors
The Endless Tower is the longest single structured combat trial in Clair Obscur: Expedition 33, and one of the few systems in the game that asks a party to plan a full 33-floor arc instead of a single encounter. Players who treat it like a normal side dungeon usually run out of healing resources by floor twelve; players who plan the climb like a long campaign tend to clear it on their first serious attempt. This walkthrough is written for both audiences, and it leans into the pacing, party roles, resource profile, and hard decision points that an Endless Tower Expedition 33 run demands.
Across the 33 floors the tower cycles between three enemy archetypes: standard Nevron mobs, named rematches against story bosses, and Chromatic-tier bosses that scale beyond anything on the main path. The reward track follows that structure. The tower hands out Pictos, upgrade materials, and cosmetics throughout the climb, with a final payout after the player clears the 33rd floor and speaks to the woman near the canvas at the end of the zone. The boss-by-boss progression and the floor layout for each of the 33 floors are mapped in detail on the Maxroll Endless Tower strategy page, which is the most direct reference for the floor-by-floor enemy lists.
What the Endless Tower actually is
The Endless Tower is a structured, sequential challenge zone rather than a procedurally generated dungeon. Each floor presents a curated set of fights, and the enemy composition is fixed. That is the most important fact to internalise before planning a run: the tower rewards preparation, not adaptation. A team that enters the first floor with a flexible, generalist composition will struggle by floor 20; a team that plans two or three role swaps ahead of the named rematches tends to clear the run.
The tower’s normal mode is a 33-floor trial that culminates in a coordinated battle against the Paintress and Renoir. Patch 1.5 also added extremely difficult secret bosses accessed through the tower’s canvases, and these are tuned to challenge optimised builds rather than gate the standard trial. Knowing which fights count toward the main progression and which are optional side challenges is the difference between a controlled 33-floor run and a chaotic one.
How to read this walkthrough
The rest of the article is structured so you can use it two ways. Read it top to bottom for a first-time climb and you will understand the rhythm of the tower, when to expect boss tiers, and where to spend resources. Use the floor tables and the role checklist as a reference on subsequent runs, especially when you are chasing the post-Patch 1.5 secret bosses or retrying a specific floor after a party wipe.
For each section you will find the structural detail (what the floor contains and which bosses cap it), the design reasoning (why the floor is paced the way it is), and the practical action (what to change in your party, what consumables to bring, and which Chromatic-tier threat demands a specific counter).
Tower structure and progression logic
The tower reads best as a sequence of three escalating tiers. Floors 1 to 3 teach the basic mob patterns and test the party against two early-game bosses. Floors 4 to 10 introduce Chromatic variants and start layering in named boss rematches, and the eleventh floor is the capstone encounter that reuses the first two bosses in their strongest forms. If a party is stable through those eleven floors, the climb from floor 12 onward is a long endurance test rather than a series of surprises.
Tier 1: floors 1 to 3 (foundations)
The first three floors focus on resource management and basic positioning. The first floor’s curated mob set ends with a rematch against the Dualliste, the second floor ends with a rematch against the Lampmaster, and the third floor layers in additional bosses before finishing with Goblu and a Chromatic Abbest. A party that clears these fights with a full reserve of healing items and at least two Pictos slots still open is in good shape for the rest of the run.
Tier 2: floors 4 to 10 (Chromatic escalation)
This is where the tower starts demanding build optimisation. Floors four and five introduce the Chromatic Echassier, the Chromatic Troubador, and the Chromatic Abberation, and each floor mixes one named Chromatic boss with one or two regular Nevron variants. By floor six the pattern repeats with the Gargant rematch, and by floor seven the player faces the Ultimate Sakapatate alongside a Chromatic Gold Chevaliere. The Chromatic boss count climbs sharply from floor seven onward, and the gaps between checkpoints shorten.
Tier 3: floors 11 to 33 (endurance and capstone)
Floor eleven is the technical midpoint: the Dualliste, Lampmaster, and Chromatic Moissonneuse return alongside a Mask Keeper, a Chromatic Clair Obscur, and a Creation-tier boss, making it the densest single floor before the late game. Floors twelve through thirty-two continue escalating the Chromatic boss count, and floor thirty-three ends the trial with a coordinated fight against the Paintress and Renoir. Clearing floor thirty-three and speaking with the woman near the canvas concludes the zone and triggers the final reward payout.
Enemy tiers, boss categories, and what each demands
The tower uses a small set of enemy categories. Recognising which category a floor belongs to is the single biggest predictor of success, because each category implies a different resource plan and a different party composition.
Standard Nevron mobs
Standard mobs such as the Cruler, Moissonneuse, Sapling, Orphelin, Braseleur, Stalact, and Catapult Sakapatate make up the bulk of every floor. They are not dangerous individually, but they chip away at healing resources and action economy. The right counter is a small set of area-of-effect abilities and a free-action Pictos that converts basic attacks into mob control. Burning a turn clearing the mob wave before the boss spawns is almost always the right call, because the Chromatic-tier boss that follows has a one-shot threshold the party cannot survive if two members are already wounded.
Chromatic-tier bosses
Chromatic bosses are the tower’s signature threat. They appear as the named boss of nearly every floor from floor four onward, often layered with regular Chromatic enemies such as the Chromatic Orphelin, Chromatic Greatsword Cultist, Chromatic Ballet, Chromatic Demineur, and Chromatic Chalier. They have higher health, two or three additional status effects, and a much larger damage spike on their signature skill. The tower’s Chromatic bosses also share a tell: they telegraph their heaviest attack with a one-second pause and a distinct visual cue, which is the reliable window for a defensive Pictos, a parry, or a healing ultimate.
Named rematches
The Dualliste, Lampmaster, Gargant, Ultimate Sakapatate, and the trio of Frost Eveque, Flame Eveque, and Chromatic Danseuse on floor nine are rematches against story bosses. They do not change their core moveset, but the tower scales their stats and adds one extra mechanic. The design reading of this is that the tower is testing whether the player learned the original fight, not whether the player can improvise. The right counter is to bring the same setup that worked in the main story and add a single utility slot, usually a cleansing Pictos or a shield break, to handle the tower’s extra layer.
Capstone bosses
The Paintress and Renoir on floor thirty-three, and the various Chromatic sub-bosses that surround them, are the tower’s capstone. They are not designed to be cheesed with a single dominant build; they reward a balanced party with two damage dealers, a support, and a dedicated healer. Players who try to brute-force the floor with three damage dealers usually clear the first phase and then wipe in the second, when the boss rotation shifts and the party cannot out-heal the new damage profile.
Floor-by-floor reference: bosses and key mobs
The two tables below condense the boss and mob data from the Maxroll tower page. The first table covers the named floors from the verified floor list, and the second table summarises the pacing window each floor belongs to. Use them as a quick checklist when you plan a run or debug a wipe.
| Floor | Curated mob set | Capstone boss(es) |
|---|---|---|
| 1 | Standard Nevron wave | Dualliste (rematch) |
| 2 | Standard Nevron wave | Lampmaster (rematch) |
| 3 | Standard and Chromatic mix | Goblu and Chromatic Abbest |
| 4 | Cruler, Chromatic Orphelin (Boss), Ceramic Chevaliere | Chromatic Echassier (Boss) |
| 5 | Sapling, Chromatic Greatsword Cultist (Boss), Orphelin; Chromatic Troubador (Boss), Chromatic Aberration (Boss), Orphelin | Chromatic Troubador and Chromatic Abberation |
| 6 | Moissonneuse, Chromatic Echassier (Boss), Catapult Sakapatate | Gargant (rematch) |
| 7 | Chromatic Bruler (Boss), Chromatic Gold Chevaliere (Boss), Aberration; Danseuse, Ultimate Sakapatate (Boss), Chromatic Luster | Ultimate Sakapatate (Boss) |
| 8 | Chromatic Bouchelier (Boss), Chromatic Lancelier (Boss), Chapelier; Obscur, Ultimate Sakapate (Boss), Chromatic Glaise (Boss) | Ultimate Sakapate and Chromatic Glaise |
| 9 | Chromatic Ballet (Boss), Chromatic Eveque (Boss), Braseleur; Chromatic Demineur (Boss), Thunder Eveque (Boss), Stalact | Frost Eveque, Chromatic Danseuse, Flame Eveque (trio) |
| 10 | Clair, Chromatic Portier (Boss), Chromatic Demineur (Boss); Chromatic Ceramic Chevaliere (Boss), Chromatic Gold Chevaliere (Boss), Chromatic Steel Chevaliere (Boss); Obscur | Chromatic Chalier (Boss), Chromatic Jar (Boss) |
| 11 | Dualliste (Boss), Chromatic Moissonneuse (Boss), Mask Keeper (Boss); Lampmaster (Boss), Chromatic Clair Obscur (Boss), Creation (Boss) | Paintress and Renoir (capstone, as listed on the verified floor page) |
| 12 to 32 | Continued Chromatic escalation across the climb | Rotating Chromatic lineups |
| 33 | Endgame mix with capstone encounter | Speak with the woman near the canvas to conclude the zone |
The second table maps each floor to the pacing window it belongs to, so you can read the tower as a curve instead of a flat list of names.
| Pacing window | Floors | Role of the window | Resource policy |
|---|---|---|---|
| Foundations | 1 to 3 | Teach basic Nevron patterns and the first two named rematches | Conserve healing items, keep Pictos slots open |
| Chromatic ramp | 4 to 8 | Introduce Chromatic bosses and start stacking named rematches | Spend one healing stack per floor, slot Chromatic Pictos as they drop |
| Trio and gate floors | 9 to 11 | Stress-test the support role and end the early climb on a stacked floor | Full healing stack, lock the loadout by floor 11 |
| Endurance climb | 12 to 32 | Long string of Chromatic boss floors with shorter recovery windows | Spend freely, avoid role swaps |
| Capstone | 33 | Coordinated Paintress and Renoir fight and the final canvas reward | Full stack, full Pictos loadout, full role configuration |
The eleven-row structure is a working pattern, not a strict contract. The tower’s pacing assumes that floors 1 to 3 teach the basics, floors 4 to 10 stress-test Chromatic counters, floor 11 is the midpoint gate, and floors 12 to 33 are an endurance run that converges on the final encounter. The named fights on each floor, the curated mob sets, and the Chromatic variants are documented floor by floor on the Maxroll Endless Tower strategy page, which is the right place to confirm a specific floor’s lineup before you start a run.
How to use the tables on a real run
Before each run, scan the floor list and mark the floors that have a boss you have not yet beaten. Bring one extra consumable stack for each marked floor, and slot a cleansing or shield-break Pictos into the support role for any floor that includes a Chromatic-tier boss. If the floor contains a named rematch, prepare the same loadout that worked in the main story plus one utility slot. The tables are intentionally short so you can fit them on a second monitor or a phone screen during a run.
Party composition and role planning
The tower punishes single-role parties and rewards parties that plan for two or three role swaps over 33 floors. A safe default composition is two damage dealers, one support, and one dedicated healer. The damage dealers should be split between a single-target nuker (for Chromatic bosses) and a multi-target specialist (for the mob waves that lead into the boss). The support role should default to cleanse, shield, or break, depending on the floor’s boss kit, and the healer should bring a high-throughput heal plus one emergency ultimate.
Damage dealer roles
- Single-target nuker: Handles the Chromatic boss in the back half of each floor. The nuker’s value is the one big burst on the boss’s break bar, which is usually the difference between a one-cycle and a two-cycle fight.
- Multi-target specialist: Clears the mob wave before the boss spawns. Without this role the party enters the boss fight with two members already at half health and the healer on cooldown, which is the most common wipe pattern in the early floors.
Support role
- Cleanse support: Required on floors that include status-heavy Chromatic enemies such as the Chromatic Ballet or Chromatic Eveque. Without a cleanse the party will lose a turn to a debuff and then lose a character to the boss’s follow-up.
- Shield support: Required on floors that include heavy single-hit attacks such as the Ultimate Sakapatate or the Chromatic Chalier. The shield role lets the party soak the boss’s signature skill and counterattack during the recovery window.
- Break support: Required on floors that include enemies with break bars, which most Chromatic bosses have. The break support’s value is the additional break damage, which accelerates the boss into the vulnerable phase.
Healer role
The healer role in the tower is closer to a raid healer than a single-target healer. The boss fights stack damage into two specific windows, usually the boss’s signature skill and the phase transition. The healer’s job is to keep the party healthy through the first window, save the ultimate for the second window, and never waste a turn on a single-target heal when a small AoE would cover the same problem. A healer who burns the ultimate on the first window will not have it for the second window, and the second window is almost always the one that ends the run.
Resource planning across 33 floors
Resources matter more than raw power in the tower. A party that enters floor one with full consumables, an open Pictos slot, and a planned role swap on floor 11 will outlast a party that enters with slightly higher stats and no plan. The tower’s resource profile is uneven: the early floors are cheap, the mid floors are expensive, and the late floors are punishing. The right spending pattern is to save the expensive consumables for floors 6 to 11, then spend freely on floors 12 onward because the late game is designed to be cleared rather than conserved.
Healing consumables
Healing consumables are the single most important resource. The tower’s mob waves are tuned to force at least one heal per floor, and the Chromatic bosses force at least one heal during the boss phase. The conservative rule is to enter the tower with three full stacks of the best available healing item, spend one stack per floor for the first five floors, then spend freely from floor 6 onward. If the party is over-budget on healing by floor 11, the run is on track. If the party is at half budget by floor 11, the run is at risk of wiping on a late floor.
Status and buff consumables
Status consumables are niche. They matter on the floors that include a status-heavy Chromatic boss and on the floors that include a status-heavy mob wave such as the Braseleur or the Stalact. The right pattern is to bring one stack of the relevant status cleanser for the floors that need it and zero stacks for the floors that do not. Carrying status consumables on every floor wastes inventory space and signals that the player did not plan the run.
Pictos and equipment
Pictos slots are the second most important resource. The tower’s reward track hands out Pictos throughout the run, and the player’s job is to slot the right Pictos at the right floor. The general pattern is to keep one open Pictos slot through the early floors so the rewards can be slotted immediately, then lock the loadout from floor 11 onward. Locking the loadout early and forgetting to slot a floor-specific Pictos is a common mistake, because the tower’s rewards are designed to be slot-flexible rather than load-defining.
Step-by-step: a clean first run
- Confirm the party’s core composition: two damage dealers, one support, one healer. Do not enter the tower with a three-DPS composition; the late floors cannot be cleared with a three-DPS composition on the first attempt.
- Stock three full stacks of the best available healing consumable, one stack of the relevant status cleanser for the floors you have already flagged, and one emergency revive item for the capstone floor.
- Enter the tower and clear floors 1 to 3 as a tutorial phase. Spend one healing stack per floor, keep one open Pictos slot, and do not commit to a final loadout until you have seen the floor 4 boss.
- On floor 4, slot the Chromatic-specific Pictos you picked up on floors 1 to 3. The Chromatic Echassier is the first real Chromatic boss in the run, and the floor is the first place the tower punishes a generic loadout.
- From floor 4 to floor 10, treat each floor as a discrete encounter. Clear the mob wave, scout the boss’s tell, and commit a healing stack to the boss phase only. Do not spend resources on the mob phase; the boss is the gate.
- On floor 11, swap to the hard configuration: full healing stack, shield or break support, and the dedicated healer. The floor 11 lineup is the densest in the tower before the capstone, and a sloppy run here ends the climb.
- From floor 12 to floor 32, run the endurance phase. Spend healing stacks freely, slot Pictos as they drop, and avoid role swaps. The endgame is designed to be cleared rather than conserved, and the right spending pattern is the one that keeps the party healthy through the boss phase on every floor.
- On floor 33, clear the capstone fight against the Paintress and Renoir with the full healing stack, the full Pictos loadout, and the role configuration you have used since floor 11. After the fight, speak with the woman near the canvas to conclude the zone and claim the final reward.
Post-Patch 1.5 secret bosses and the canvas route
Patch 1.5 added several extremely difficult secret bosses that are accessed through the tower’s canvases rather than through the normal floor progression. They are not required to clear the 33-floor trial, and they are explicitly tuned to challenge optimised builds. Treat them as an optional endgame layer rather than a main progression step.
The practical implication is that a player who clears the main 33 floors on the first attempt and then tries the canvas bosses with the same loadout will wipe. The canvas bosses scale higher than the floor 33 capstone, and they require a dedicated build swap, usually a damage-focused composition with two nukers and a break support, which means sacrificing the dedicated healer. Plan a separate run for the canvas layer rather than chaining it to the main trial.
Common failure modes and how to debug them
Most tower wipes come from one of three patterns: a mob wave that was not cleared before the boss, a healing stack that was spent on the wrong floor, or a role configuration that was not swapped on a known gate floor. Each pattern has a specific signal in the combat log and a specific fix that does not require restarting the run.
Failure mode: party enters boss with two members wounded
Signal: the boss fight starts with the healer on cooldown or with one damage dealer below 50 percent health. Fix: clear the mob wave with the multi-target specialist and save the healer’s cooldowns for the boss phase. The mob phase is not the gate; the boss phase is the gate.
Failure mode: healing stack is empty by floor 11
Signal: the party runs out of healing consumables during the floor 11 lineup. Fix: enter the tower with one extra stack of healing consumables, or reduce the per-floor spending in floors 1 to 5 from one stack to half a stack. The mid floors are where the resource profile flips from conservation to spend, and a party that flips too early runs dry before the late game.
Failure mode: support role is wrong for the boss kit
Signal: the boss’s signature skill lands cleanly and the party loses a member. Fix: check the floor’s boss list in the table above and pick the support role that counters the boss’s kit. A status-heavy boss wants cleanse; a single-hit boss wants shield; a break-bar boss wants break. The wrong support role is a wipe, and the right support role is a one-cycle.
Rewards, cosmetics, and the value of a clean run
The tower awards three reward categories: Pictos, upgrade materials, and cosmetics. Pictos are the most common drop and are designed to be slot-flexible, which means a player who clears the tower on a clean run can equip a new Pictos immediately and apply it to the next run. Upgrade materials are rarer and tend to drop on the Chromatic boss floors, with the highest density on floors 4 to 10. Cosmetics are the rarest drop and are tied to specific floors; the final cosmetic is awarded when the player clears floor 33 and speaks with the woman near the canvas.
The tower’s value sits in the Pictos and upgrade pipeline rather than the cosmetic payout. A player who clears the tower once has a stronger party for the rest of the game’s optional content, and a player who clears the tower on a hardmode configuration has the strongest baseline party in the game. The tower is the cleanest single source of repeatable progression in the late game, and the 33-floor structure is the right way to pace that progression.
Frequently asked questions
How many floors are in the Endless Tower in Expedition 33?
The Endless Tower is a 33-floor structured trial. The first floor starts with a curated Nevron mob wave and ends with a rematch against the Dualliste, and the structure repeats through the early floors. The full floor-by-floor lineup, including the curated mob sets and the capstone boss for each floor, is documented in the Maxroll Endless Tower strategy guide.
Do I have to clear all 33 floors in one run?
The tower is structured as a single sequential run, but the game does not force a single-attempt clear. If the party wipes, the run ends and the rewards collected so far are banked. A clean first run usually takes one to two hours depending on the party composition and the per-floor pacing, and a re-run after a wipe is usually faster because the player has already seen the boss telegraphs.
What is the hardest floor in the Endless Tower?
Floor 11 is the densest single floor before the endgame, with the Dualliste, Chromatic Moissonneuse, Mask Keeper, Lampmaster, Chromatic Clair Obscur, and a Creation-tier boss all on the same lineup. The capstone on floor 33 is the hardest single fight, but it is supported by the full Pictos loadout and the full healing stack. Floor 11 is harder to brute-force because the party is still in the conservation phase of the resource profile.
What is the best party composition for the Endless Tower?
Two damage dealers, one support, and one dedicated healer. The damage dealers should be split between a single-target nuker and a multi-target specialist, and the support should be flexible enough to swap between cleanse, shield, and break depending on the floor’s boss kit. Three-DPS compositions clear the early floors faster but cannot survive the late floors without a dedicated healer.
Are the Patch 1.5 secret bosses required to clear the tower?
No. The Patch 1.5 secret bosses are accessed through the tower’s canvases and are explicitly designed as an optional endgame layer for optimised builds. They are not part of the normal 33-floor trial, and they are tuned to challenge a party that has already cleared the standard run at least once.
What rewards does the Endless Tower give?
The tower awards Pictos, upgrade materials, and cosmetics throughout the run, with a final payout when the player clears floor 33 and speaks with the woman near the canvas. Pictos are the most common drop and are designed to be slot-flexible, while upgrade materials are concentrated on the Chromatic boss floors. The cosmetic set is tied to specific floors and is the rarest reward category.
Should I save my best healing items for the final floor?
No. The tower’s resource profile is uneven, and the right spending pattern is to save the expensive consumables for floors 6 to 11, then spend freely from floor 12 onward. The late game is designed to be cleared rather than conserved, and a party that arrives at floor 33 with a full healing stack but a wounded party will lose the capstone fight anyway.
Can I use the same loadout for every floor?
You can, but it is not optimal. The tower’s boss kits vary widely, and the right support role changes by floor. A generic loadout clears the early floors and wipes on the Chromatic boss floors. Plan at least two role swaps (one around floor 4 and one around floor 11) and slot the floor-specific Pictos as they drop.
How do I unlock the Endless Tower in Expedition 33?
The Endless Tower is unlocked through the main story progression. Once it is unlocked, it remains accessible from the same fast-travel point for the rest of the playthrough. The tower does not require a specific party level, but the recommended baseline is the level you finish the main story at, plus at least one full round of Pictos upgrades.
Is the Endless Tower worth running more than once?
Yes. The tower’s Pictos and upgrade pipeline is the cleanest repeatable progression source in the late game, and a second run with a stronger party is the best way to push for the canvas-layer secret bosses added in Patch 1.5. A player who clears the tower once has a stronger party for the rest of the game’s optional content, and a player who clears the tower on a hardmode configuration has the strongest baseline party in the game.


Leave a Reply