Arc raiders enemies: what you actually fight on the surface
The phrase arc raiders enemies usually points to a very practical question. A squad drops onto the surface, hears the warning siren, and has about thirty seconds to decide whether to push toward a calling, extract, or stand and fight. The decision turns on what kind of ARC machine just rolled over the ridge, what it tends to do in the next few seconds, and how the rest of the squad’s loadout can punish it. The piece below is a developer-facing reference for the kinds of ARC machines the extraction shooter puts in front of players, the combat roles those machines fill, and the design reasons behind the patterns that surface during a session.
ARC Raiders, developed by Embark Studios and positioned as a PvPvE extraction shooter set on a Rust Belt Earth abandoned after an apparent first-contact event, treats its enemies as the core of every encounter loop. The ARC machines are the obvious adversaries, but the surface is also shaped by hazard zones, deployable fortifications, and other squads. The Wikipedia entry on ARC Raiders is a useful starting point for the broader setting and release context, and the arc raiders preview: arc raiders impressions feature describes how the machines behave under live squad pressure. Both are useful anchor references when thinking about how the game turns machines into readable combat roles.
How ARC machines are organized in the encounter
Each ARC machine is built from a chassis, a sensor package, a movement set, and one or more combat behaviors. The chassis decides durability and silhouette, the sensor package decides what triggers an aggro, and the behavior set decides what it does once it has you. That structure is what allows the game to read clearly even when several machines roll into the same fight. A small, fast chassis with a long sensor range acts like a scout. A heavy, slow chassis with a shield acts like a bunker. A hovering chassis with a chain weapon acts like a flanker. Reading which archetype is on the field is usually the first step to surviving a fight.
Players can expect a consistent set of roles: light reconnaissance, medium assault, heavy suppression, support, and the occasional boss-tier prototype. Each role has a recognizable silhouette, a recognizable sound, and a recognizable set of tells during a wind-up. The section below walks through each role, what it looks like in motion, what it tends to do to a squad, and what a competent squad does in return.
Light ARC scouts: the early warning system
Light scouts are the smallest ARC units a squad will see on the surface. They are fast, fragile, and built around early detection. Their job in the encounter design is to create pressure before the real fight starts. When a scout spots a squad, the aggro passes up the chain: nearby assault units start moving toward the contact point, and a heavy unit may reposition to cut off the obvious retreat. If a squad learns to read scouts, it can break line of sight before the heavier units commit, which is often the difference between a clean extract and a lost loadout.
Scouts lean on speed rather than firepower. A typical scout engagement ends in two or three seconds because the unit is either killed quickly or it slips behind a ridge and brings friends. Because the chassis is light, body shots are often enough to break their posture. They are loud, however. The sensor chirp that a scout emits when it acquires a target is one of the most reliable audio cues in the game, and good players use it as a timer for how long they have before heavier units start to converge.
Behavior cues and how to read them
Three cues tell a squad that a scout is about to escalate an encounter. The first is the chirp. It is short and rises in pitch, and it is the scout’s aggro confirmation. The second is a brief pause where the scout orients toward a target. The third is the pivot, when the scout turns away from the squad and starts moving toward the nearest heavy unit. That pivot is the last moment to break the chain, because once the heavy unit changes facing, the squad has lost its stealth window.
Medium ARC assault units: the workhorses of the surface
Medium assault units are the most common ARC chassis on the surface. They sit in the middle of the silhouette range, they have enough durability to absorb a magazine of small-arms fire, and they carry a primary weapon that defines their combat role. A medium assault unit can be a rifle carrier, a shotgunner, a grenadier, or a melee charger depending on the specific loadout the encounter designer assigned. The same chassis supports several weapons, which is why two encounters that look similar can feel very different under fire.
Because medium units are the most common, a squad’s default plan is built around them. Positioning is set to minimize their firing angles. Cover is chosen for height, because medium units struggle with vertical angles. Ammo economy is set around the assumption that at least two medium units will be present in any contested calling. Players who plan for medium units first and treat the heavy units as a special case tend to extract more consistently than players who plan for heavies first and hope the mediums do not matter.
Why medium units feel different in PvPvE
In a pure PvE shooter, medium units are a problem to solve. In a PvPvE extraction shooter like ARC Raiders, they are also a resource. Two squads can use the same medium unit as a screen, a distraction, or a flank enabler. The ARC does not know which player is friendly and which is hostile, so it tends to aggro whoever is closest and loudest. That behavior is the structural reason that third-partying works in extraction shooters, and the same behavior is what a careful squad uses to slip past a fight when the risk of staying is too high. The team that wins is usually the team that understands the ARC is acting on local information and not on a global plan.
Heavy ARC units: the suppression role
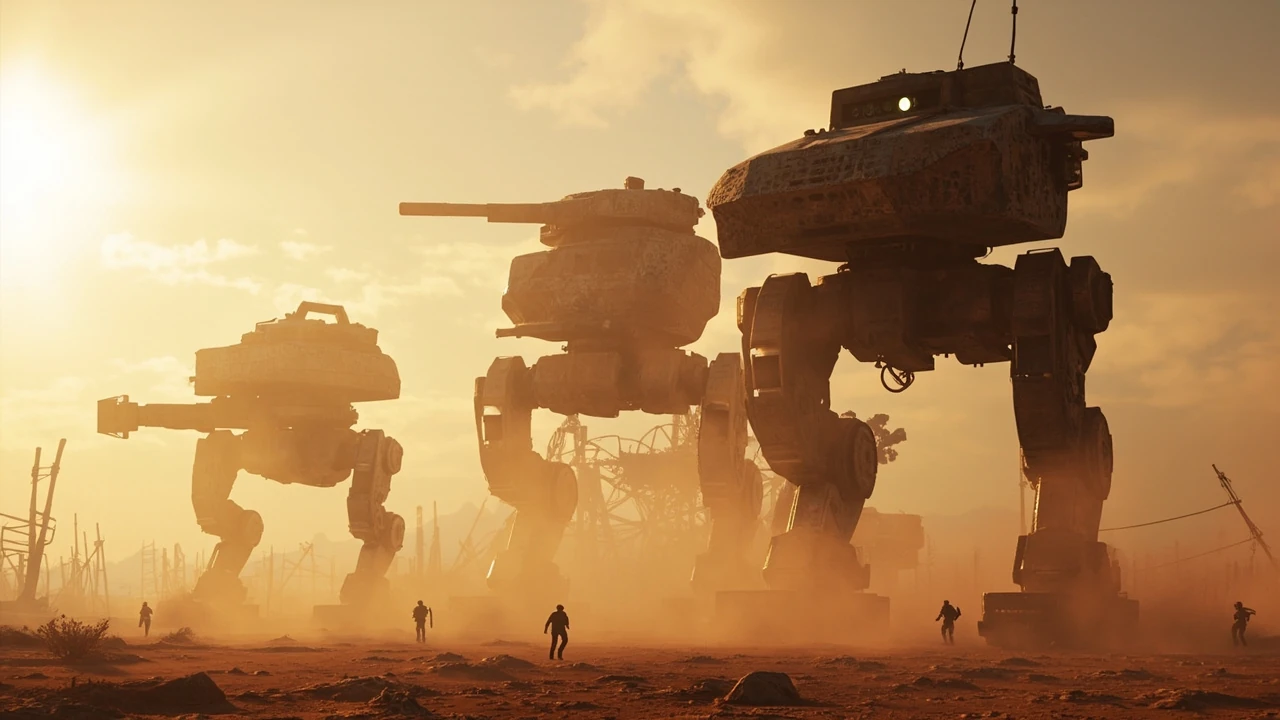
Heavy units are the large, slow chassis that anchor a contested area. They have thick plating, a high-durability profile, and weapons that suppress an area rather than pick a target. Minigun mounts, plasma bursts, missile racks, and shockwave emitters are common heavy loadouts. The combat role is to deny space. A heavy unit does not need to kill a squad to win its fight. It only needs to keep the squad pinned long enough for mediums to close, or long enough for another squad to take the calling.
Heavy units are also the encounter designer’s main lever for difficulty. A calling that is meant to feel dangerous has a heavy at the center. A calling that is meant to feel rewarding but stable has mediums and scouts but no heavy. Reading the spawn composition is a skill that experienced players develop over dozens of drops, and it is also useful for developers who want to understand which lever to pull when balancing risk and reward.
How squads punish heavies
Three reliable squad tactics work against heavies. The first is focus fire from cover. Two or three players with mid-range weapons pour fire into a weak point while the rest of the squad keeps the mediums busy. The second is flanking from elevation. Heavies struggle with targets above their firing arc, and a squad on a roof or scaffold can burn one down with minimal risk. The third is utility denial. Stun grenades, smoke, and emp-style effects can interrupt a heavy’s wind-up, which turns a lethal burst into a survivable window. None of these tactics is hidden, but each requires a squad that has practiced the timing.
Support ARC units: the underrated threat
Support units are the easiest enemies to underestimate because their damage output is often lower than a medium’s. They make up for it by changing the encounter rules. A support unit might deploy a shield over a heavy, repair a damaged medium, or jam a player’s targeting system. The support role is what stops a squad from cheesing a heavy through pure focus fire, and it is what forces a squad to think about target priority before opening a magazine.
Because support units sit behind the front line, they are usually behind cover. A squad that ignores a support unit will see its damage ramp up over the course of the fight, because the support is steadily undoing the squad’s work. A squad that calls out the support and routes one player to flank it usually wins the same fight in half the time. The combat lesson is that the threat is not always the unit with the biggest gun, and the design lesson is that encounter pacing benefits from enemies that change the rules rather than just increase the damage.
ARC subtypes and the “feels different” problem
Each broad role above has several subtypes. A medium assault unit can be a chain-gunner, a flamer, a grenade carrier, or a close-range brawler. A heavy can be a minigun bunker, a missile platform, or a shockwave hammer. The role stays the same, but the play changes. That is the point: the role gives the encounter structure, and the subtype gives the encounter flavor.
Players sometimes describe this as a “feels different” problem when a subtype makes a fight surprising. The design response is usually to telegraph the subtype clearly. The silhouette, the weapon, the idle animation, and the audio all carry information about what is about to happen. A player who has learned to read those tells is rarely caught flat-footed. A player who is still learning the language of the game will occasionally walk into a subtype they have not seen before and pay the price, which is part of the learning loop.
Subtype reference for raid planning
- Light scout: long sensor range, low durability, used to chain aggro to bigger units.
- Medium rifleman: standard pressure, balanced range and damage, the most common subtype.
- Medium shotgunner: short range, high burst, used to hold doorways and corridors.
- Medium grenadier: long range, area denial, used to break pushes across open ground.
- Heavy minigun: suppression role, sustained fire, weak at vertical angles.
- Heavy missile: burst damage, weak at close range, vulnerable during reload.
- Heavy shockwave: short-range area denial, very dangerous in tight spaces.
- Support shielder: front-line durability, requires flank pressure to break.
- Support jammer: disables player gadgets, must be killed first in coordinated squads.
How ARC enemies shape squad loadouts
Loadouts in ARC Raiders are not built in a vacuum. They are built around the assumption that the squad will encounter a mix of light, medium, and heavy units, plus another squad. The list below is a practical loadout checklist that a squad can use as a starting point, then adjust based on the specific calling they intend to contest.
- One mid-range primary per player for medium and heavy work.
- One close-range secondary per player for shotgunner and shockwave units.
- One long-range marksman or designated marksman rifle per squad for heavies at range.
- Two stun or utility grenades per player for support denial.
- One healing or revive tool per player to stabilize after a heavy burst.
- One deployable cover or barricade per squad to break heavy sightlines.
The reason for the ratios is structural. Mid-range weapons are the default because mediums are the most common enemy. Close-range secondaries exist because shotgunner and shockwave subtypes can close a gap faster than expected. The marksman rifle exists because heavies reward focused fire, and a single high-damage player can shave seconds off a heavy kill. Utility exists because support units change the encounter when they are alive. Healing and cover exist because the extraction shooter loop assumes a squad will take damage and recover, and a squad without recovery tools tends to bleed out before extract.
Role assignments inside the squad
Once the loadout is set, the squad needs role assignments. The most stable assignment pattern is two scouts, one anchor, and one finisher. Scouts move first, draw aggro from light and medium units, and call the support positions. The anchor holds a defensible position and applies sustained fire to the heavy. The finisher rotates between support denial and kill confirmation on isolated mediums. The pattern is not the only valid pattern, but it maps cleanly to the role structure of the ARC roster, and it is a useful reference when designing squad play in similar titles.
Reading the field: spawns, callings, and the pacing loop
ARC enemies do not spawn in fixed locations. They spawn in response to callings, timer windows, and squad behavior. A calling is a high-value objective on the surface, and it is the main reason a squad drops into a particular area. When a calling activates, the encounter designer schedules a wave composition that fits the calling’s risk profile. Low-risk callings attract scouts and a few mediums. High-risk callings attract heavies and support units, sometimes in combination.
That pacing loop is one of the most useful things for a developer to study, because it shows how a small set of archetypes can produce a wide range of feels without rewriting the AI. The same medium assault unit can feel easy in a low-risk calling and threatening in a high-risk calling, because the supporting cast changes. The same heavy can feel like a wall in one encounter and a checkpoint in another, because the squad’s positioning and the calling’s terrain are different. The enemy roster is small. The space of feels is large. That is the design win.
What makes a fair fight against ARC enemies
A fair fight against an ARC unit has three properties. The player can see the unit before taking damage. The player has a counter that the unit is vulnerable to. The player’s counter has a window long enough to use under pressure. If any of those properties breaks, the fight starts to feel cheap. A scout that snaps onto a player from behind a wall with no audio cue feels cheap. A heavy that ignores focus fire from a clearly weak point feels cheap. A support unit that is invisible until it has already changed the encounter feels cheap.
The game’s tuning philosophy, as far as it can be read from public previews and community play, treats those three properties as a design checklist. New subtypes are added with clear silhouettes, clear weak points, and clear counter windows. Existing subtypes are tuned when a counter fails. Players who learn to read the enemy roster will often notice when a subtype violates one of those properties, and the community conversation about those moments is part of how extraction shooters stay balanced over time.
Table: ARC roles at a glance
| Role | Silhouette | Primary behavior | Common counter | Risk if ignored |
|---|---|---|---|---|
| Light scout | Small, fast, low profile | Detection, aggro chaining | Quick kill, break line of sight | Pulls heavies into the fight |
| Medium rifleman | Mid-sized, bipedal | Sustained mid-range fire | Cover, mid-range focus | Steady chip damage to the squad |
| Medium shotgunner | Mid-sized, short barrel | Close burst, doorway control | Spacing, secondaries | One-shot knockdowns in tight areas |
| Medium grenadier | Mid-sized, tube or rack | Long-range area denial | Flank, vertical repositioning | Forces bad pushes across open ground |
| Heavy minigun | Large, shielded | Sustained suppression | Focus fire, vertical angles | Pins the squad for mediums to close |
| Heavy missile | Large, open back | Burst damage at range | Close the gap, punish reload | Devastating bursts in open terrain |
| Heavy shockwave | Large, hammer or emitter | Short-range area knockback | Maintain range, kite | Disrupts pushes and cover holds |
| Support shielder | Mid-sized, front barrier | Front-line durability | Flank, focus swap | Keeps the heavy alive under fire |
| Support jammer | Mid-sized, antenna array | Player gadget disable | Priority target, fast kill | Squad loses utility at the worst moment |
Table: Squad response by enemy composition
| Composition | Read | Best squad response | Likely mistake |
|---|---|---|---|
| Scouts only | Patrol, no anchor | Break line of sight, slip past | Firing at scouts and aggroing the area |
| Mediums only | Contested calling | Use cover, focus fire, rotate | Spreading damage across too many targets |
| Heavies only | Defensive objective | Vertical angles, sustained focus | Staring at the front plate |
| Mixed mediums and heavies | High-risk calling | Split roles, anchor the heavy | Letting mediums collapse on the anchor |
| Support only | Modifier wave | Flank the support, deny utility | Ignoring the support to chase the heavy |
| Full mixed wave | Endgame calling | Pre-assigned roles, controlled push | Loose formation, uncoordinated focus |
Designing encounters around ARC roles
For developers building similar extraction systems, the most useful lesson from the ARC roster is that role separation produces clearer reads than raw stat scaling. A squad can be overwhelmed by a single heavy that hits ten times harder than a medium, but the squad will not learn anything from that fight. The same squad can be taught how to play by a wave that mixes a heavy, a support, and two mediums, because each unit asks a different question and each answer can be practiced.
Encounter design benefits from a small role list and a larger subtype list, because the role list is the language and the subtype list is the vocabulary. Players learn the language quickly, then spend much longer learning the vocabulary. That is a good investment curve for an extraction shooter, because the game needs to keep teaching after the first dozen hours. It is also a good model for indie developers who want a wide roster without ballooning the AI budget, because the AI can share most of its behavior tree across a role and only diverge on the subtype’s weapon and timing.
What role-driven design avoids
Role-driven design avoids a few common failure modes. The first is the “stat wall,” where the only difference between a tier one and a tier five enemy is hit points and damage. The second is the “swarm” trap, where the encounter designer compensates for a weak role by adding more copies of it, which dilutes the readability of the field. The third is the “boss-only” problem, where the only interesting enemies are the rare ones and everything else is filler. None of those failure modes is fatal on its own, but each one pushes the encounter away from the kind of readable, learnable combat that extraction shooters need in order to stay interesting across hundreds of drops.
Threat ladders and squad escalation
Most squads in ARC Raiders work through a quiet threat ladder. They start by avoiding scouts, then they engage mediums only when the calling is worth the fight, then they take heavies when their loadout and their team are ready, and they only attempt the full mixed wave when the calling’s reward is high enough to justify the risk. That ladder is not enforced by the game. It is enforced by the players, because each rung of the ladder has a real cost and the cost is paid in lost loadouts.
The ladder is also useful as a developer reference. It shows that the game is teaching a vocabulary without explicit tutorials. The first time a squad meets a heavy and loses, the squad does not feel cheated, because the heavies are visible, audible, and have a known counter. The squad just had not yet learned the counter. The game respects that learning curve by keeping the heavy rare enough that each encounter is memorable, but common enough that the squad can expect another chance within a few drops.
Common squad mistakes against ARC enemies
- Chasing scouts instead of breaking line of sight, which chains aggro to heavies.
- Tunneling on the heavy and ignoring the support, which lets the support undo the squad’s work.
- Firing from low ground at a heavy’s front plate, where the damage is wasted.
- Using long-range marksman rifles in close corridors against shotgunner subtypes.
- Splitting the squad across the field, which lets mediums isolate single players.
- Triggering a calling without checking the spawn composition, which forces a bad fight.
- Standing still to revive a teammate in the open, which is a free kill for any ARC in line of sight.
Most of these mistakes are not build mistakes. They are role mistakes. A squad with the right loadout still loses if the roles are not assigned and the focus fire is not coordinated. The reverse is also true. A squad with a mid-tier loadout can still win if the roles are clean and the focus is consistent. That is one of the reasons that ARC Raiders feels closer to a tactical game than to a pure shooter: the enemy roster is the language, and the squad’s role assignment is the grammar.
How ARC enemies interact with other squads
Extraction shooters do not exist in a PvE vacuum. The ARC roster is also the environment that other squads operate in, and the role of the ARC in PvP is to be a third party. A squad that is fighting a heavy cannot easily turn and fight another squad, because the heavy will punish the exposed back. A squad that is pinned by mediums cannot flank the squad on the ridge, because the mediums will collapse on the flanker. The ARC roster is therefore a soft terrain feature, and good squads use it the way they use physical terrain.
That is one of the reasons that third-partying is so common in extraction shooters, and it is one of the reasons that a careful squad will sometimes let another squad start a fight before committing to a calling. The ARC enemies do not care which squad wins. They just attack the loudest nearby target. A squad that understands that rule can choose the timing of its push to land on a tired opponent, which is often a cheaper fight than engaging the ARC roster at full strength.
Limitations of a role-based enemy roster
Role-based rosters have a few known limitations. The first is that the game can feel predictable once a player has learned the roles. That is mitigated by the subtype vocabulary, but only up to a point. The second is that role-based rosters can feel homogeneous across callings, because the same role list recurs. The third is that role-based rosters can under-deliver on a one-off encounter, because the role list is shared and a new subtype is a rare event. None of these limitations is fatal, and the extraction shooter format tolerates them because the squad-side variability is high.
The other practical limitation is balance work. Each new subtype has to be tested against each existing role, which is a combinatorial problem. Embark Studios’ public communication suggests a willingness to iterate on subtypes, which is the right posture for a game that wants to keep its encounter reads clear over a multi-year live cycle. The same posture is worth copying in smaller projects, because the cost of a poorly balanced subtype is much higher than the cost of a slow subtype release.
Frequently asked questions
What are the main arc raiders enemies a squad will face?
The main arc raiders enemies are organized into light scouts, medium assault units, heavy units, and support units. Each role has several subtypes that share a silhouette but differ in weapon and timing. The mix of roles changes by calling, with low-risk callings leaning on scouts and mediums and high-risk callings adding heavies and supports.
How does a squad identify a heavy ARC before it opens fire?
A heavy ARC is identified by silhouette, sound, and movement. The chassis is large, the weapon is bulky, and the movement is slower than a medium. Audio is often the first cue, because the heavy’s idle and weapon-charge sounds travel further than the medium’s. Once a squad knows the heavy’s facing, the squad can pick a vertical angle and a focus point.
Why do scouts feel more dangerous than their damage suggests?
Scouts feel dangerous because they chain aggro. A scout on its own is a small threat, but a scout that links a squad to a nearby heavy is a large threat. The scout is the early warning system that turns a quiet patrol into a contested area, which is why experienced squads shoot scouts quickly or break line of sight before the chain completes.
What is the most common squad mistake against arc raiders enemies?
The most common mistake is chasing scouts instead of breaking line of sight. The second most common mistake is ignoring the support unit to focus the heavy. Both mistakes cost the squad the same resource, which is time, and the time is usually spent taking damage that the squad did not need to take.
Do arc raiders enemies scale with squad size?
Enemy spawns do scale with the calling and the player traffic in the area, but the underlying role list stays the same. A squad of two and a squad of three will both face a mix of scouts, mediums, and occasionally heavies, but the timing and the spawn density will differ. That is one of the reasons that the game reads cleanly even when squad sizes vary.
How should a solo player approach a mixed ARC wave?
A solo player should treat a mixed wave as a multi-step problem. The first step is breaking the scout chain, because a solo player cannot afford a heavy in the open. The second step is thinning the mediums from cover, because mediums are the most consistent source of chip damage. The third step is deciding whether the heavy is worth fighting at all, because a solo player can often extract with a partial reward rather than a full clear.
Are there boss-tier arc raiders enemies in the game?
The public previews describe a small set of prototype or boss-tier ARC units that appear in specific callings or events. These units combine the durability of a heavy with the utility of a support, and they tend to anchor the highest-risk callings. Squads usually plan loadouts and roles around these units specifically, because the cost of a failed attempt is high.
How often does the ARC roster change after launch?
Live extraction shooters tend to add new subtypes seasonally and rebalance existing subtypes more often. The exact cadence for ARC Raiders depends on the studio’s live plan, but the design language of the roster is built to support additions without breaking the role reads that existing players have learned. That is a strong signal that the studio is treating the roster as a long-term vocabulary rather than a one-shot set.

Leave a Reply