
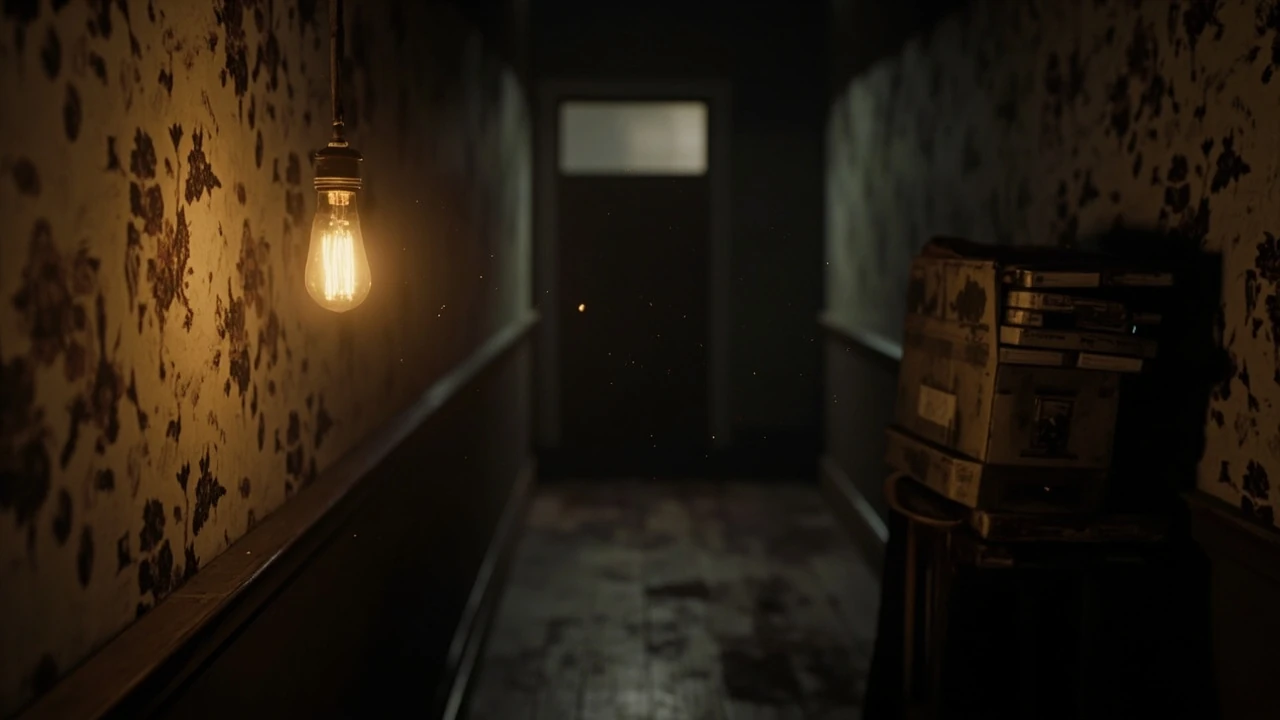
Resident Evil 7 walkthrough: a clean route through the Baker house
The first hour of Resident Evil 7 is one of the most discussed openings in modern survival horror. You wake up in a run-down Louisiana guest room, you have no inventory, and the only guidance you receive is a short, anxious video call from a missing wife. A walkthrough has to do more than point at the next door. It has to tell you when to fight, when to run, and when a small detour will save you twenty minutes of backtracking later. This guide gives you a complete route through the main story, with the item priorities, boss strategies, and resource decisions that actually decide whether your run survives the Baker family.
Everything below is written for a first playthrough on Normal difficulty. Madhouse changes ammo placement, enemy placement, and removes certain checkpoints, so the resource logic in this guide does not transfer cleanly. If you plan to play Madhouse, treat the section on resource pressure as a baseline and expect to lean on it much harder.
Prerequisites and loadout before you start
Resident Evil 7 is short by modern standards. A focused first run lands between nine and twelve hours, and a speedrun of the main story sits around one and a half hours. Because the window is small, your starting decisions matter more than in a forty-hour RPG. Decide three things before the title screen.
- Pick your difficulty honestly. Normal gives you autosaves, a generous item pool, and a checkpoint before every boss. Madhouse removes most of those checkpoints and randomizes pickups.
- Decide on casual or full exploration. A completionist run adds antique coins, Mr. Everywhere statues, and the file collection. A main-story run skips most of them.
- Choose your input. The first-person camera is the entire game. If you play on a high-latency display, lower aim sensitivity before the first fight or you will burn healing items in panic.
Two background features change how you read this guide. First, the VHS tape system lets you control characters in the past, which means locked doors in the present can often be opened by playing a specific tape. Second, the antacid and steroid drugs are extremely limited in Normal, so you should treat healing as a real resource, not a free reset. If you want a wider overview of how this title fits in the series timeline, the long-running franchise entry on the Resident Evil Wikipedia page covers the numbered series, the spin-offs, and the engine shifts that led into RE7’s first-person pivot.
Act 1: the guest house and the welcome video
The opening is more scripted than it looks, and a smart route saves you a panic heal. Walk out of the guest room, pick up the handgun from the table near the window, and open the hallway door. The game funnels you toward the dining room. Your only goal here is survival and information. Burn zero healing items in the next ten minutes unless you are about to die.
Guest house room walkthrough
Search every drawer in the guest room. You will find a healing item, a clip of ammunition, and the remote control that opens the nearby TV. Watching the tape is optional for progression but unlocks a small bonus later if you revisit the guest room. Once you move into the hallway, ignore the first locked door on the right. The game lets you open it, but the room behind it only contains flavor text on a first run and will be revisited at a much safer point.
Dining room and first encounter
The dining room is where the game tests your aim. Three enemies rush you in two waves. Aim for the head, fire twice per target, and do not chase anyone into the next room. The first run is teaching you a rule that holds for the entire game: the Baker family resists bullets more than random molded, and random molded resist bullets more than you expect. Two center-mass shots drop a standard molded, two headshots drop a fat molded, and Jack Baker needs three to four solid hits before he slows down.
Act 2: the main house and the item puzzle chain
After the dining room, you reach the main house lobby. This is the hub for roughly the next four hours of the game. The house is a two-story layout with a save room on the first floor, a weapons locker upstairs, and a basement that you only enter near the end. Treat the save room as your home base. Every trip back there is a chance to store items, swap weapons, and read the next note you picked up.
Key items you will find in the main house
- Burner phone, which is required to receive calls that unlock new side rooms.
- Scorpion key, used on the east wing door and the second floor study.
- Snake key, used on the training room door and the attic hatch.
- Happy birthday tape, the central VHS that explains the basement access sequence.
- Three serum vials, hidden in the morgue, the main house bathroom, and the greenhouse.
Do not burn keys on the wrong door. The Scorpion and Snake keys each have exactly two uses, and a single mistake will force you to backtrack through a Jack Baker chase sequence. If a door does not respond, you are in the wrong branch of the house. Read the map on the wall in the save room before you move.
VHS tape route through the main house
The VHS tapes are the single most efficient progression tool in the game. Playing a tape from the TV in the guest room shifts you into a past scenario. When the tape ends, you return to the present with a new ability or a previously locked item. The tapes you must play, in order, are:
- Old news report, in the guest room. Unlocks the basement access shortcut.
- Happy birthday, found in the upstairs study. Required to enter the basement proper.
- Survive or die, the boat tape. Unlocks the second half of the ship sequence.
Skipping a tape is the most common reason a walkthrough falls apart. New players often assume the tapes are flavor content and miss the boat sequence, which gates the final boss.
Act 3: the garage, the morgue, and Jack Baker boss fight
Once you have the Scorpion key and the burner phone, the route opens toward the garage. The garage holds a chainsaw, the first real boss weapon, and Jack Baker. The encounter is split into two phases. The first phase is a hand-to-hand sequence in a confined room. The second phase is a chase through the garage with the chainsaw as your only weapon.
Jack Baker phase one strategy
Phase one is scripted, so ammo and positioning matter more than skill. Keep the workbench between you and Jack, watch for the wind-up animation, and dodge by strafing left. Two handguns shots to the head stagger him. When the cutscene ends, the chainsaw drops in front of you. Pick it up immediately. The chainsaw has limited fuel, so do not waste it on the molded wandering the corridor. Save it for the next phase.
Jack Baker phase two strategy
Phase two is a short chase with a damage window at the end of the hallway. Run, do not shoot, until you reach the second door. Jack closes the gap, you dodge, and the chainsaw combo triggers. Two clean chainsaw hits end the fight. Heal only if you are below half health. A panic heal in the chase sequence is the single most common death in the run. Readers For additional context, who want more background on Resident Evil can use the Wikipedia article while reviewing this point.
Act 4: the morgue, the greenhouse, and the serum chain
The morgue and greenhouse are where the game stops being a shooter and starts being a route puzzle. The serum chain is the gating system. You need three vials to cure Mia, and the vials are hidden behind a series of key combinations that only make sense if you read the notes in the right order. Treat the chain as a checklist: one vial from the morgue, one from the greenhouse, one from the ship. Skipping any vial locks the ending choice to the default path.
Morgue route
The morgue is a one-way trip on a first run. Once you enter, the molded spawn rate triples and the exit door locks behind you. The morgue key combinations, in order, are:
- Dial 1, found on a clipboard near the reception desk. Combination 1-4-3.
- Dial 2, found on a body in the cold room. Combination 2-0-3.
- Dial 3, found on a note in the director’s office. Combination 0-9-6.
The third dial opens the serum cooler. Grab the vial, then run for the exit. Do not fight the molded that spawn behind you. Sprint, slide under the low door, and the chase ends when the cutscene triggers. If you picked up the burner phone before the morgue, the reception desk will ring with a call from Zoe that gives you the second combination early. Skipping the call forces you to search the cold room by hand, which costs roughly four minutes on Normal.
Greenhouse route
The greenhouse holds the second serum and the Marguerite boss fight. The greenhouse has three sections, separated by locked doors. Each section has a different puzzle type, a corrosive item, and a molded ambush. The easiest path is to clear the first section for the corrosive, then loop to the second section for the lever, then return to the first section to break the chemical lock. The third section is a dead-end storage room on a first run, so do not waste a key on its door. Save the Snake key for the attic hatch instead.
Marguerite behaves differently from Jack. She telegraphs every attack with a two-second wind-up, and her leg stun is the only consistent stagger window. Aim for the knees until she drops, then switch to the shotgun for the follow-up. Two clean staggers end the fight, and a third is your safety margin. Burn a healing item only after the second stagger, never before, because she will hit you once during the approach whether you heal or not.
Act 5: the ship and the final serum
The ship sequence is the longest uninterrupted run in the game. You board a wrecked tanker, fight through four decks, and find the final serum in the captain’s quarters. The ship is also where the game introduces the molded horde, a wave of standard enemies that respawn every two minutes until you trigger the next cutscene. The respawn timer is generous enough that you can loot every locker, but it is short enough that standing still in a corridor is a death sentence.
Deck-by-deck ship route
- Deck A, cargo hold. Loot the lockers, pick up the grenade launcher, and head up the stairs.
- Deck B, crew quarters. This is the longest deck. The door codes are on the whiteboard near the infirmary, so read it carefully before you start opening doors.
- Deck C, engine room. Avoid the two fat molded. They take four to five grenade rounds each, and the grenade launcher has a four-round clip.
- Deck D, bridge. The final serum is on the captain’s desk. The door is rigged to trigger the Marguerite boss fight on the way out.
Do not waste the grenade launcher on the corridor molded. Save every round for the engine room and the bridge escape. The grenade launcher is also the only weapon that staggers the molded horde without a critical hit, so a single wasted round in a corridor changes the math for the rest of the deck. If you are running low on handgun ammo by Deck C, the lockers near the infirmary contain two respawning clips, but the respawn timer is the same as the molded respawn, so plan the loop carefully.
Act 6: the final boss and the ending sequence
The final sequence is a short gauntlet. You escape the ship, return to the Baker house, and trigger the Eveline fight in the mold-infested basement. The fight is more cinematic than tactical. You have a limited pool of ammo, a regenerating health bar on the boss, and a single environmental trap that deals the killing blow. The trap is hidden in the corner of the family room, and the camera does not point at it until the second phase. Walk the room before the cutscene so you know exactly where to lure her.
Final boss strategy
The Eveline fight has three phases. Phase one is a chase, phase two is a stand-up fight in the family room, and phase three is the cinematic finish. The key decision is when to use the antacid and steroid drug. Save both for the transition between phase one and phase two, when Eveline deals her highest single hit. Two headshots per phase with the handgun stagger her, and three full shotgun blasts end each phase. The trap in the corner of the room is the cinematic kill. Lure her to it, and the cutscene ends the fight.
New game plus and ending branches
Your ending depends on three decisions, all made in the last twenty minutes of the game. The first decision is whether to cure Zoe or Mia. The second is whether to inject the remaining serum into yourself. The third is whether to destroy the tape reel or keep it. None of these decisions are reversible after the final cutscene, so save before the choice and reload if you want a different outcome. New Game Plus unlocks the Albert-01 handgun, the infinite rocket launcher, and the 21 mode. The 21 mode is a blackjack-style minigame that awards antique coins for every win, and the coins unlock the upgrade tree that is otherwise locked behind the main story.theverge.com/2021/9/27/22692268/resident-evil-4-vr-capcom-oculus-quest-2-release-date” target=”_blank” rel=”noopener”>verified article for an independent source about resident evil 4 vr is launching october 21st on oculus quest 2.
Resource and inventory management
Resident Evil 7 is a backpack-management game as much as it is a horror game. The inventory is a fixed grid, and every slot you waste is a slot you cannot use for healing later. A clean run keeps the inventory at roughly 60 percent capacity at all times. The table below shows the priority order for a Normal run.
| Priority | Item class | Storage rule | First-use timing |
|---|---|---|---|
| 1 | Keys and key items | Always carry | As soon as you find them |
| 2 | Weapons and ammo | Carry one full clip, store the rest | Save area before each major fight |
| 3 | Healing items | Carry one, store the rest | Only when below half health |
| 4 | Antidote and steroid drugs | Carry both | Save for boss transitions |
| 5 | Throwables and consumable traps | Carry one, store the rest | Use on standard molded, never on bosses |
| 6 | Treasure and crafting parts | Store immediately | Use the save room to combine |
The rule that surprises most new players is the healing priority. The game gives you more healing items than you can use on a Normal run, but it gives you fewer than you need on a Madhouse run. Healing is also a hard reset, not a regeneration, so wasting a heal at full health is just inventory bloat. A second surprising rule is that ammunition is not the real resource. Inventory space is. A clean run throws away loose handgun ammo, picks up high-value weapon ammo, and keeps the grid open for healing.
The storage box in the save room is shared across the run, so items you deposit in the guest house are still there when you return from the ship. Use this to your advantage. Before the ship sequence, deposit every healing item you do not need for the next boss. The ship has its own healing pool, and carrying your main inventory into the tanker is the fastest way to lose a clean run. The same rule applies in reverse after the ship: empty the ship storage into the save box before you trigger the Eveline fight, because the basement does not respawn lockers.
Combat and enemy behavior reference
The enemy roster is small, but each enemy has a behavior profile that matters once you start playing the game seriously. The table below summarizes the four enemy types you will face on a first run.
| Enemy type | Where you first meet | Stagger window | Recommended weapon | Resource cost |
|---|---|---|---|---|
| Standard molded | Dining room | Two headshots | Handgun | 2 bullets |
| Fat molded | Greenhouse | Five body shots | Shotgun | 2 shells |
| Jack Baker | Garage | Phase scripted | Chainsaw, then chainsaw combo | Full chainsaw fuel |
| Marguerite Baker | Greenhouse boss room | Three leg stuns | Handgun for stun, shotgun for stagger | 1 full clip, 2 shells |
| Molded horde (ship) | Deck B | Continuous grenade stagger | Grenade launcher | 1 grenade per 4 enemies |
| Eveline (final) | Basement family room | Two headshots per phase | Handgun then shotgun | 2 clips, 6 shells, 1 trap |
Use this table to read enemy spawns, not as a list of targets to clear. Every enemy on this list is a resource cost, and a clean run routes around the cost by using the environment. The molded cannot open doors. The fat molded can break barrels. Jack and Marguerite are scripted and cannot be skipped on a first run. The fastest path is the one that lets you sprint past the standard molded and use the doors as chokepoints. The molded horde is the one exception: the ship corridors are too narrow to dodge, and the grenade launcher is the only weapon that staggers the wave without a critical hit. Save every grenade for the horde, and use the handgun on the lone strays between waves.
Save room and checkpoint discipline
The save room is the single most important location in Resident Evil 7. It is the only place you can store items, swap weapons, and read your full notes. It is also the only consistent checkpoint on Normal. Use it on a fixed rhythm.
- Before every new area, store at least one healing item and one ammo clip.
- After every major fight, return to the save room and reorganize the grid.
- When you find a key item, store everything that is not required for the immediate next step.
- Read the map before you leave. The Baker house layout punishes players who walk out without a route.
A common mistake is to use the save room as a healing station and ignore the storage. The room is a load-bearing piece of game design. The faster you internalize that, the cleaner your run becomes. A second habit worth building is reading the wall map in the save room every time you enter, even if you already know the route. The map updates as you unlock doors, and a quick glance catches the side rooms you would otherwise walk past.
Missable collectibles and route side trips
A main-story run skips roughly a third of the content. If you are going for trophies, files, or the 21 mode unlock, the side trips below save you a second playthrough. None of them gate the ending, but each one adds a small reward that compounds over a run.
- Mr. Everywhere statues, 20 in total. Thirteen are in the main house, four in the ship, three in the greenhouse. Each statue gives a small antique coin when broken with the knife.
- Antique coins, 18 in the main story. Sold to the Duke on the ship for weapon upgrades and stat boosts. The order of sale does not matter.
- Files, 30 in the main story. Most are on side tables in the main house. The locked drawer in the director’s office holds three at once.
- VHS tapes, 9 in total. Three are required for progression, six are flavor. The flavor tapes unlock cosmetic bonuses in the extras menu.
The fastest side trip is the antique coin in the greenhouse, which is on the same path as the second serum. The slowest is the file in the attic, which requires the Snake key and a backtrack through the training room. If you are short on time, the attic file is the first one to skip. It is flavor text, and the bonus it unlocks is a single loading screen tip.
Common mistakes that cost a first run
Most failed first runs in Resident Evil 7 die in the same three places. Knowing the pattern in advance is the difference between a clean run and a frustrated restart.
- Panic healing in the Jack Baker chase. The panic heal is the highest-value inventory slot in the game, and a single wasted heal in the chase sequence forces a restart on Madhouse.
- Skipping the Happy Birthday VHS tape. The tape is the only way to open the basement, and skipping it locks the route out at the morgue.
- Using the grenade launcher on corridor molded. The launcher has four rounds, the engine room needs two, and the bridge needs two. A single wasted round in a corridor is unrecoverable.
Beyond these three, two softer mistakes also slow first runs. New players often open every drawer in the first hour and overflow the inventory before the first boss. They also tend to fight every molded in the corridor, when the optimal play is to sprint past the corridor and engage the molded only when a door is closed behind them. A third softer mistake is ignoring the burner phone. The phone rings at fixed story beats, and the calls give you combinations, side room codes, and the only reliable hint about the serum chain. If the phone rings during a fight, let it ring. The voicemail is stored in the save room and you can read it between areas.
How this route holds up on a second run
The route in this guide is the same on a second run, but the resource math changes. New Game Plus gives you the Albert-01 handgun, which has a sixteen-round clip and infinite ammo as long as you do not reload. The infinite-ammo rule removes the inventory pressure from the handgun, which means you can carry more healing items and fewer ammo clips. The trade-off is that the Albert-01 cannot stagger bosses as cleanly as the upgraded handgun, and the chainsaw remains the only reliable boss finisher. The second run is also the right time to try Madhouse, because the route is already in muscle memory and you can focus on the resource math instead of the navigation.
If you played the game on console and are curious about the VR version of the wider franchise, the launch coverage of Resident Evil 4 VR on the Oculus Quest 2 is a useful reference for how Capcom has handled first-person ports. The RE4 VR port is not the same game as RE7, but the design lessons transfer: first-person camera, limited inventory, and a save room that anchors the whole run. A second run on a VR headset is also where the molded horde stops being a resource puzzle and starts being a panic puzzle, so plan the deck route with that in mind.
Frequently asked questions
How long is a main-story run of Resident Evil 7?
A focused first run on Normal takes about ten to twelve hours. A completionist run with all antique coins, Mr. Everywhere statues, and files takes closer to eighteen. A speedrun of the main story only takes about one and a half hours, but it requires a very specific route and skip knowledge.
Should I play Madhouse on a first run?
No, unless you are already comfortable with survival horror inventory pressure. Madhouse removes most checkpoints, randomizes ammo placement, and increases the number of enemies per room. The route in this guide still works, but the resource math in the table above no longer applies. A safer first run is Normal, followed by Madhouse as a second run once you know the route.
Where do I find the Happy Birthday VHS tape?
The Happy Birthday tape is on the second floor of the Baker house, in the study behind the Scorpion key door. You must play the tape in the guest room TV to unlock the basement access shortcut. The tape is the single most skipped progression item in the game.
Do I need to play every VHS tape?
No, but you do need to play the three tapes listed in the VHS route section above. The other tapes are flavor content, and skipping them does not lock the route. If you are going for a completionist run, the missing tapes add an extra two to three hours of optional exploration.
What is the best weapon upgrade priority?
Upgrade the handgun first, then the shotgun. The grenade launcher and the magnum have high damage but very limited ammo, and they do not benefit as much from the early upgrades. The handgun is your primary stagger tool for the entire run, and the shotgun is your anti-fat-molded tool. Every other weapon is situational.
Can I save Mia and Zoe at the same time?
No. The serum chain gives you exactly enough vials to cure one person. The choice happens near the end of the game, after you have collected all three vials. The choice is irreversible, so save before the cutscene and reload if you want to see the other ending.
Does the order of antique coin collection matter?
No. Antique coins are sold to the Duke in the ship sequence for weapon upgrades and stat boosts. The order of collection does not matter, and you do not need all of them to finish the game. A completionist run expects roughly 18 coins across the main story areas.
Are there missable achievements or trophies?
Yes. The two most common missable trophies are the “1F, 2F, 3F, 4F” trophy, which requires opening every locked door in the main house, and the “Just Get Me Outta Here” trophy, which requires finishing the game in under four hours. Both are achievable on a first run, but only if you plan for them.
What should I do before the final boss?
Before the Eveline fight, make sure you have at least two healing items, one full clip of handgun ammo, and one full clip of shotgun ammo. The fight is more cinematic than tactical, and the resource pool is your only margin. The antacid and steroid drug are both useful, but only one is required if you play the dodge timing correctly.
Is Resident Evil 7 worth replaying after the first run?
Yes, but only after a break. The route in this guide covers the main story, and the second run is the right place to explore the 21 mode, the unlockable weapons, and the Madhouse difficulty. The route in this guide still applies, but the resource math changes significantly.






Leave a Reply