
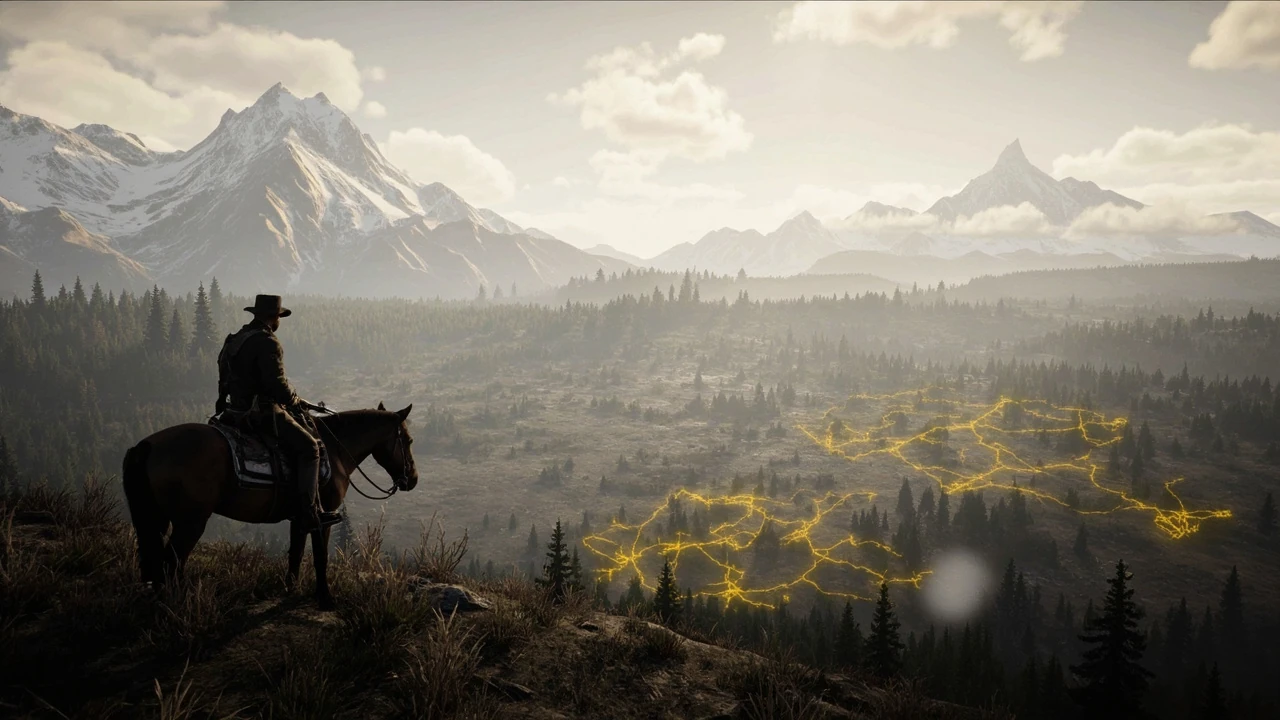
RDR2 legendary animals map: where to find every hunt in Red Dead Redemption 2
The rdr2 legendary animals map is the most useful single reference for filling the compendium, kitting out the Trapper, and crafting the strongest trinkets in the game. Legendary animals only spawn past specific story and challenge thresholds, each one lives in a fixed biome, and every kill is gated behind a short chain of golden clues. Knowing the order, the region, and the prerequisites turns a frustrating scavenger hunt into a checklist you can clear in two or three focused sessions.
This page is written for hunters who want the full picture: which animals exist, where each one lives on the world map, the story missions and Hunting Challenge ranks that unlock them, the gear that makes the fights survivable, and the small gameplay rules that decide whether a pelt actually reaches the Trapper. Every location and reward below is grounded in the verified reference at the heart of this page, so the route you plan is the route the game expects you to take.
How the rdr2 legendary animals map is structured
Red Dead Redemption 2 spreads its legendary animals across the five major regions of the map: the Grizzlies, Big Valley, Cumberland Forest, the Heartlands, Lemoyne, and New Austin. The map tool you use to plan a hunt is the same in-game map Arthur opens from the satchel. Each legendary has its own entry once you enter its radius, and a yellow on-screen alert tells you when the area is loaded.
Once inside the radius, the animal is not handed to you. You have to track it. The reference material is explicit: each legendary animal has three clues you must find in order, with the single exception of the Legendary Bharati Grizzly Bear, which only requires two. The clues appear as faint golden markers visible only when you activate Eagle Eye. You follow clue one, then two, then three, and only after the third does the animal itself appear.
This structure is why a clean rdr2 legendary animals map matters more than a raw list of names. The clues are spread out, and several animals share regions. If you do not know that the Legendary Bighorn Ram sits just across the river from Valentine while the Legendary Elk lives east of Bacchus Station, you can waste a real-world hour bouncing between them.
Prerequisites before you start hunting
Most of the iconic hunts gate behind Chapter progress, and one gates behind a Hunting Challenge. Riding straight for an animal before the game has unlocked it simply does nothing. Before you ride out, confirm the following.
- Complete Chapter 1 so the legendary system is active. After that point, ten legendary animals become available, with five tied to main story missions and one tied to a challenge.
- Finish the Chapter 2 mission “Exit Pursued By a Bruised Ego” before you hunt the Legendary Bharati Grizzly Bear.
- Finish the Chapter 4 mission “Country Pursuits” before you hunt the Legendary Bullgator. The reference notes this one may not appear until the beginning of Chapter 6, so be patient if the area is silent.
- Work the ninth Hunting Challenge, which is the requirement for one of the other legendaries tied to naturalism progress rather than story.
- Carry a rifle, a repeater or shotgun, a bow with improved arrows if you prefer silent kills, and enough tonics for at least one long fight.
A practical session order is to clear all Chapter 2-gated animals first, then push into Chapter 4, and finish the rest in New Austin and Lemoyne once the southern roads are open. The map below reflects that order.
The rdr2 legendary animals map: region by region
Use this table as your at-a-glance rdr2 legendary animals map. It pairs each region with the animals you will find there, the story gate, and the order of clues you can expect.
| Region | Landmark area | Legendary animal | Story / challenge gate | Clue count |
|---|---|---|---|---|
| Grizzlies East | O’Creagh’s Run | Legendary Bharati Grizzly Bear | Chapter 2, “Exit Pursued By a Bruised Ego” | 2 |
| Grizzlies West | Lake Isabella | Legendary White Bison | Chapter 2 onward | 3 |
| Grizzlies East | Cotorra Springs geysers | Legendary Wolf | Chapter 2 onward | 3 |
| Big Valley | West of Strawberry | Legendary Buck | Chapter 2 onward | 3 |
| Cumberland Forest | East of Bacchus Station | Legendary Elk | Chapter 2 onward | 3 |
| The Heartlands / New Hanover | Cattail Pond, west of Valentine | Legendary Bighorn Ram | Chapter 2 onward | 3 |
| Lemoyne (Hennigan’s Stead border) | South of Elysian Pool, west of Van Horn | Legendary Beaver | Chapter 2 onward | 3 |
| Lemoyne (Scarlett Meadows) | Dewberry Creek, dry river bed | Legendary Coyote | Chapter 2 onward | 3 |
| Lemoyne (Scarlett Meadows) | Mattock Pond meadows | Legendary Fox | Chapter 2 onward | 3 |
| Lemoyne (Bluewater Marsh) | Northeast corner of Lemoyne | Legendary Boar | Chapter 2 onward | 3 |
| Lemoyne (Bayou NWA) | West of Lakay | Legendary Bullgator | Chapter 4, “Country Pursuits” | 3 |
| New Austin | East of New Austin meadows | Legendary Tatanka Bison | Chapter 4 onward | 3 |
The Legendary Moose sits in the far northeast of the map in the snowy Grizzlies. The Legendary Panther is the southern outlier, west of Shady Belle at the south end of Lemoyne, and the Legendary Pronghorn rounds out the roster on the western plains. The table above is a planning layer, and the detailed region walkthroughs below add the hunt-specific notes the map alone cannot give you.
Hunt loadout at a glance: weapons, consumables, and effects
Before diving into region walkthroughs, it helps to know what each kill actually delivers. The table below pairs every legendary on the map with its primary reward, the trinket or talisman you craft from the second drop, and the practical effect that perk has on the rest of the run. Pelt quality does not matter for legendaries, so the priority is damage and survival, not clean-kill bonus.
| Legendary animal | Primary reward (Trapper) | Trinket or talisman (Fence) | Effect |
|---|---|---|---|
| Legendary Bharati Grizzly Bear | Legendary Bear Pelt | Bear Claw Talisman | Decreases health core drain by 10% |
| Legendary White Bison | Legendary White Bison Pelt | Bison Horn Talisman | Slows stamina core drain by 10% |
| Legendary Wolf | Legendary Wolf Pelt | Wolf Heart Trinket | Doubles alcohol tolerance before drunk penalties |
| Legendary Buck | Legendary Buck Pelt | Buck Antler Trinket | Reduces pelt quality penalty for wrong weapon or body shot |
| Legendary Elk | Legendary Elk Pelt | Elk Antler Trinket | Increases looted money by 10% |
| Legendary Bighorn Ram | Legendary Ram Hide | Ram Horn Trinket | Doubles herbs gathered from Thyme, Oregano, and Mint |
| Legendary Beaver | Legendary Beaver Pelt | Beaver Tooth Trinket | Decreases weapon degradation by 10% |
| Legendary Coyote | Legendary Coyote Pelt | Coyote Fang Trinket | Increases Dead Eye experience gain by 10% |
| Legendary Fox | Legendary Fox Pelt | Fox Claw Trinket | Extends Eagle Eye duration by 5 seconds |
| Legendary Boar | Legendary Boar Pelt | Boar Tusk Talisman | Reduces horse health and stamina core drain by 10% |
| Legendary Bullgator | Legendary Alligator Skin | Alligator Tooth Talisman | Decreases Dead Eye core drain by 10% |
| Legendary Panther | Legendary Panther Pelt | Panther’s Eye Trinket | Slows Dead Eye drain for 3 seconds after activation |
| Legendary Tatanka Bison | Legendary Tatanka Bison Pelt | Tatanka Bison Horn Trinket | Reduces melee damage received by 10% |
| Legendary Moose | Legendary Moose Pelt | Moose Antler Trinket | Increases health experience gain by 10% |
Cross-reference the two tables while you plan a session. Picking up the Buck Antler Trinket, the Bison Horn Talisman, and the Boar Tusk Talisman early covers the most common mid-game frustrations: pelt penalties, stamina drain, and a horse that will not stay healthy across long rides.
Northern hunts: Grizzlies, Big Valley, Cumberland, and the Heartlands
The northern half of the rdr2 legendary animals map is where most players begin, and the cold is part of the challenge. Plan warm clothing, a rifle with enough reach, and a horse that can handle rocky slopes before you ride out of Valentine.
Legendary Bharati Grizzly Bear (O’Creagh’s Run)
The bear lives north of the lake at O’Creagh’s Run in Grizzlies East and is the first real fight on the list. The reference notes it has only two clues, not three, and it charges aggressively after the first sniper shot. You will need about four sniper rounds to put it down, and if you cannot keep distance, the boulders marked on the detail map serve as unbreakable cover. The bear cannot reach you on top of those rocks, and you can land clean shots from the high ground.
Legendary White Bison (Lake Isabella)
This is the second snowy hunt, set by Lake Isabella in the northwest of the map. The bison is durable and the cold slows your stamina recovery, so pack potent snake oil and seasoned big game meat. The kill rewards the Legendary White Bison Pelt, which goes to the Trapper, and the Legendary Bison Horn, which unlocks the Bison Horn Talisman at the Fence. That talisman slows stamina core drain by ten percent, a meaningful upgrade for any build that relies on sprinting and melee.
Legendary Wolf (Cotorra Springs)
The wolf is aggressive but not as lethal as the bear or cougar. The standard pattern is to open with a sniper round, then close with a repeater or shotgun once it commits. As with the bear, climbing one of the nearby boulders removes the threat entirely while you finish the kill. The wolf drops the Legendary Wolf Pelt and the Legendary Wolf Heart. The heart becomes the Wolf Heart Trinket, which doubles how much alcohol Arthur can drink before the negative effects of being drunk start.
Legendary Buck (Big Valley)
The buck lives in the forest on the west side of Big Valley, northwest of Strawberry. It is a calmer fight than the predators and a good place to test your sniper aim against a moving target. Skinning it gives the Legendary Buck Pelt and the Legendary Buck Antler. The antler unlocks the Buck Antler Trinket, which reduces the pelt quality penalty for using the wrong weapon or missing a clean headshot. That perk pays off across a full play-through.
Legendary Elk (Cumberland Forest)
The elk hangs out in the hills just east of Bacchus Station. The terrain is gentle, but elk are large and can soak rifle rounds, so bring enough ammo. The Legendary Elk Pelt goes to the Trapper, and the Legendary Elk Antler becomes the Elk Antler Trinket, which increases the money you loot from bodies and containers by ten percent.
Legendary Bighorn Ram (Cattail Pond)
The ram lives near Cattail Pond, west of Valentine across the river. It is one of the easier kills on the rdr2 legendary animals map, but its location close to Valentine makes it a common accidental encounter for players roaming the Heartlands. The ram drops the Legendary Ram Hide and the Legendary Ram Horn, which becomes the Ram Horn Trinket. The trinket doubles the herbs you gather from Thyme, Oregano, and Mint, which feeds your cooking pipeline for the rest of the game.
Eastern and southern hunts: Lemoyne, the bayou, and New Austin
South of the Heartlands, the rdr2 legendary animals map changes character. Swamps replace pines, and the gators replace the elk. These are the toughest fights in the game and deserve the most prep, so a working knowledge of every region across the RDR2 legendary animal locations and maps reference is worth keeping open while you ride.
Legendary Beaver (south of Elysian Pool)
The beaver is on the river south of Elysian Pool and west of the Van Horn Trading Post, at a large beaver dam. It is one of the easier kills: a single well-placed headshot from a rifle or bow drops it. The Legendary Beaver Pelt goes to the Trapper, and the Legendary Beaver Tooth becomes the Beaver Tooth Trinket, which decreases weapon degradation by ten percent. That perk matters more than it sounds, since legendary hunts burn through repeater and rifle durability.
Legendary Coyote (Dewberry Creek)
The coyote runs the dry river bed of Dewberry Creek in the northwest corner of Lemoyne. Coyotes travel in pairs, but the legendary spawns as a single target. The Legendary Coyote Fang becomes the Coyote Fang Trinket, which boosts Dead Eye experience gain by ten percent. Combined with the Bison Horn Talisman, this lets a player build out a Dead Eye-heavy build quickly.
Legendary Fox (Mattock Pond)
The fox lives in the meadows around Mattock Pond in Lemoyne. It is skittish, so approach slowly and use a scoped rifle. The Legendary Fox Claw becomes the Fox Claw Trinket, which extends Eagle Eye duration by five seconds. That extra window is a real ergonomic improvement for tracking other legendary animals later on.
Legendary Boar (Bluewater Marsh)
The boar is on the edge of Bluewater Marsh in the northeast corner of Lemoyne. Boars charge and can shred a horse in seconds, so dismount before engaging. The Legendary Boar Tusk becomes the Boar Tusk Talisman, which reduces horse health and stamina core drain by ten percent, a quality-of-life upgrade for long rides between regions.
Legendary Bullgator (Bayou NWA, west of Lakay)
The bullgator is the headline fight on the southern rdr2 legendary animals map, gated behind the Chapter 4 mission “Country Pursuits” and possibly not available until the beginning of Chapter 6. It is aggressive, durable, and lives in dense swamp where visibility is short. The reference recommends opening with a sniper from range, switching to a repeater or shotgun as it closes, and popping Dead Eye for the final stretch. If it gets on top of you, run, let it break off, and shoot it again while it is disengaging. The legendary skin and tooth combine into the Alligator Tooth Talisman, which decreases Dead Eye core drain by ten percent.
Legendary Panther (west of Shady Belle)
The panther is the deadliest non-gator predator in the game. It ambushes from cover and can kill Arthur in one or two pounces if you are not ready. The standard counter is to apply Cover Scent before entering the area, watch the treeline, and use the dodge timing the reference describes: aim with the left trigger, then press left or right on the left stick plus the X or Square button to roll out of the pounce. The Legendary Panther Eye becomes the Panther’s Eye Trinket, which slows Dead Eye drain for three seconds after activation.
Legendary Tatanka Bison (east of New Austin)
The Tatanka lives in the meadows on the east side of New Austin, the desert region in the southwest of the map. The climate and the open ground make this a different kind of fight: cover is sparse, so use the rolling terrain and elevation rather than rocks. The Legendary Tatanka Bison Horn becomes the Tatanka Bison Horn Trinket, which reduces melee damage received by ten percent.
Reading clue chains: how to actually follow the rdr2 legendary animals map
The clues themselves are simple once you have seen one, but the first hunt can feel disorienting. The on-screen alert at the top left tells you when you have entered a legendary animal’s area. After that, you are looking for faint yellow indicators only visible in Eagle Eye, which is bound to LS or L3 plus RS or R3 on a controller. The first indicator is a single clue, often near the road or a landmark. The next two are progressively closer to the animal’s lair.
If you cannot find a clue, walk in slow circles at the rough midpoint of the area while in Eagle Eye. Clues are tied to a small radius, not the full region, and the indicator is easy to miss at full sprint. The zoomed-in map style that good hunting guides use shows numbered markers that match the clue order, so you always know if you are looking for clue one, two, or three.
The rdr2 legendary animals map is most useful as a layered tool: the world map for region planning, the in-game satchel map for the radius, and Eagle Eye for the actual clues. The three layers need to agree with each other, which is why it is worth saving before you commit to a clue chain.
Hunting loadout: weapons, consumables, and horse care
You can clear the rdr2 legendary animals map with a small set of well-known items. The reference is explicit that pelt quality does not matter for legendaries, so the priority is damage, range, and survivability rather than clean-kill bonus.
- Primary weapon: a sniper rifle. It gives the range you need for the grizzly, the white bison, the bullgator, and the panther, and the same rifle works for every other animal on the list.
- Secondary weapon: a repeater or a sawed-off shotgun. The repeater is the better general-purpose option, while the shotgun is useful in close swamp fights.
- Optional: a bow with improved arrows for the smaller, less aggressive hunts like the beaver and the fox.
- Healing: potent snake oil for Dead Eye, and either miracle tonic or regular health cures in case a predator lands a pounce.
- Horse care: potent horse stimulant, horse reviver, and at least one set of improved saddle bags. A fast, calm horse with high health is non-negotiable for the longer rides.
- Scent control: cover scent lotion for the panther and the bullgator. Both predators rely on smell, and one application removes half the risk.
For the bear and the wolf, the verified reference notes that climbing one of the boulders marked on the detail map puts the animal into a state where it cannot reach you. The boulders are explicitly drawn on the supporting maps, so plan to dismount near one of them rather than fight on the flat.
After the kill: getting the pelt to the Trapper and the parts to the Fence
One of the easiest mistakes on the rdr2 legendary animals map is to skin the animal and then get killed by wolves, riders, or a second predator on the way to camp. The reference confirms a forgiving recovery rule: if you die or lose a legendary skin before reaching the Trapper, it will appear in his inventory, but you lose the money you would have received for selling it. That is a real cost, so the safe play is to skin, store on the horse, and ride to a Trapper before any side content.
The split between Trapper and Fence is also worth keeping in mind. The Trapper only accepts the legendary pelts and crafts clothing and accessories from them, and the regular butcher will not buy a legendary pelt. The Fence only cares about the second drop, the teeth, claws, antlers, horns, hearts, and tusks, and uses them to craft trinkets and talismans. Trinkets can be crafted with the animal part alone, while talismans need extra ingredients, so plan your Fence visits around which talismans you actually want.
A practical workflow is to finish a hunt, ride straight to the nearest Trapper, sell the pelt, then visit the Fence to craft the trinket or talisman. The Legendary Animal effects stack well: the Buck Antler Trinket pairs with the Bison Horn Talisman and the Boar Tusk Talisman to round out a build that is forgiving, well-fed, and ready for late-game combat.
The “too much activity” error and how to recover from a lost fight
Two practical failures will interrupt a hunt. The first is the “too much activity in the area” message, which means a random event is occupying the legendary’s spawn zone. The reference explains that this includes encounters like campers or bounty hunters riding with a prisoner. The fix is to ride roughly a minute outside the area, save the game, reload, or camp and sleep for 24 hours.
The second failure is dying to the legendary itself. Once Arthur dies, the animal despawns and you need to leave the area, sleep for 24 hours, or reload an earlier save before it respawns. Combined with the rule that animals do not respawn once skinned, this means a reckless fight can set you back by a real-world hour. The reference’s tip on using boulders and range is the cleanest way to avoid that loss.
Frequently asked questions
How many legendary animals are on the rdr2 legendary animals map?
After Chapter 1, ten legendary animals are available. Five are gated by main story missions, one is gated by the ninth Hunting Challenge, and the remaining four can be hunted once you have completed Chapter 1 and reached the relevant region.
What is the first legendary animal I should hunt?
The Legendary Bharati Grizzly Bear is the earliest fight most players should attempt, because it only requires Chapter 2’s “Exit Pursued By a Bruised Ego” mission. The Legendary Bighorn Ram and the Legendary Beaver are the easiest first kills if you want to learn the clue system before taking on a predator.
Do legendary animals respawn after you skin them?
No. Once you have killed and skinned a legendary animal, it does not respawn. If you lose the pelt, the reference confirms it will appear in the Trapper’s inventory, but the sale money is lost.
What does the “too much activity in the area” message mean?
It means a random event is happening inside the legendary’s spawn zone. The fix is to ride about a minute outside the area and either save and reload, or set up camp and sleep for 24 hours. After that, the legendary should respawn as normal.
Which legendary animal drops the most useful trinket?
Value depends on your playstyle, but the Buck Antler Trinket, the Bison Horn Talisman, and the Boar Tusk Talisman are widely considered the strongest trio because they fix the pelt penalty, slow stamina drain, and protect the horse. For Dead Eye builds, the Coyote Fang Trinket and the Panther’s Eye Trinket are the standout pair.
Should I use a sniper rifle for every legendary hunt?
Yes, for the dangerous ones. The reference recommends opening with a sniper and finishing with a repeater or shotgun when the animal closes. The beaver and the fox are the exceptions, where a single headshot from a rifle or a clean arrow from a bow is enough.
Can I sell a legendary pelt to a regular butcher?
No. Only the Trapper accepts legendary pelts, and the Trapper uses them to craft clothing and accessories rather than pay cash for them directly. The animal parts that are not pelts, like teeth, claws, and antlers, must be taken to the Fence to be turned into trinkets and talismans.
What happens if I die to a legendary animal?
You respawn at the last camp or waypoint, and the animal is gone. The reference notes that you need to leave the area and sleep for 24 hours, or reload a save, for it to respawn. Once you have skinned a legendary, it does not respawn at all.
Do I need Eagle Eye to follow the clues on the rdr2 legendary animals map?
Yes. The yellow indicators that mark each clue are only visible while Eagle Eye is active. Toggle it with LS or L3 plus RS or R3 on a controller, then walk slowly toward the indicator until the prompt to investigate appears.
Why are the bullgator and the panther harder than the northern predators?
Both are larger, faster, and more aggressive than the Grizzlies predators, and both live in terrain that reduces your range. The verified reference recommends a sniper first, then a repeater or shotgun, and to use Cover Scent before entering the area so neither predator gets a free pounce.






Leave a Reply