
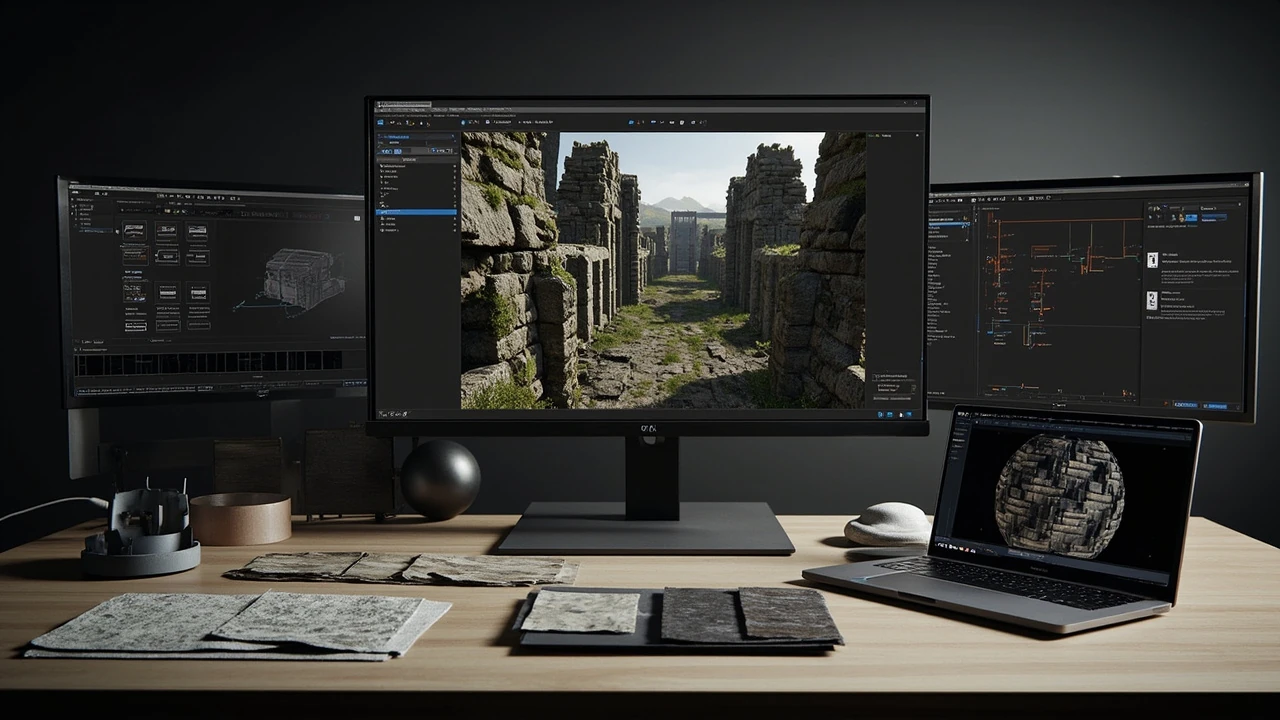
How to build an environment artist portfolio that demonstrates real production skill
A strong environment artist portfolio does more than display attractive final renders. It gives a hiring manager enough evidence to understand what you can research, plan, model, texture, light, assemble, and optimize within a believable production pipeline. The strongest case is usually a focused environment project that explains both the creative intent and the technical decisions behind the final scene.
This means treating each portfolio piece as a compact piece of production documentation. The viewer should be able to identify the scale of the scene, the role of modular construction, the reason behind the art direction, and the controls used to make the work manageable. If the final image looks polished but the process remains hidden, the portfolio risks reading like a gallery rather than evidence of professional ability.
A useful environment artist portfolio can be built around one substantial scene, provided that scene shows deliberate decisions rather than an accumulation of assets. The same piece can also be reused in a controlled way across your website and an application package, with each format emphasizing a different part of the work. Start with the project goal, identify the skills you need to prove, and only then choose the tools and presentation format.
Decide what one portfolio project must prove
Begin with a specific professional claim, such as demonstrating modular environment construction, believable material variation, atmospheric lighting, or the ability to take a concept into a real-time scene. A broad claim such as “I am a skilled 3D artist” gives the viewer no useful criteria and encourages an unfocused collection of work.
Choose one primary target role. An environment artist working toward junior studio positions needs to demonstrate control of the core pipeline, reliable execution, and clear communication. A senior applicant may need to show art direction, team-scale planning, performance awareness, and the ability to define visual standards for other artists. A technical environment artist may need stronger evidence around constraints, automation, shaders, or engine integration.
| Career signal | Evidence to include | Weak substitute |
|---|---|---|
| Core environment construction | Blockout, modular pieces, assembled scene, and game-ready capture | A close-up render that hides scale and construction |
| Material authoring | Reference, material graphs or texture process, tiling checks, and engine result | One polished surface with no evidence of repeatability |
| Art direction | Palette, mood, lighting brief, composition, and decision rationale | A style label without supporting images |
| Production readiness | Topology, texel density, naming, collision, LODs, and performance notes | High-resolution geometry with no production context |
| Problem solving | Constraints, tests, failures, and the resulting design adjustment | A finished scene presented as if it appeared without iteration |
Before opening a modeling application, write a short project brief. Include the intended experience, player scale, target mood, number of major materials, gameplay implications, and the skills under examination. A helpful brief might ask for a compact ruin beside a path, with a sheltered focal point and a clear path toward it. That is enough to guide decisions without designing an entire game level.
Limit the project’s ambition. A narrow subject can be more convincing when its composition, construction system, and technical treatment are coherent. The goal is not to hide a lack of variety; it is to show that you can make focused decisions and carry them through production.
Research references without copying their identity
Reference should clarify a design problem, not become a substitute for your own decisions. Collect images that show relevant architecture, surface wear, material behavior, vegetation, lighting conditions, or spatial rhythm. Record what each reference contributes and separate those observations from your intended interpretation.
The Rookie environment breakdown Creating an Epic 3D Environment for your Game Portfolio illustrates a useful sequence: define a purpose, research the source atmosphere and palette, create a rough blockout, and test materials in an engine before committing to the full build. That sequence keeps visual research connected to a practical production plan.
Use references across several categories rather than collecting a large folder of similar images. A balanced reference set can include:
- Architectural references for scale, proportion, construction, and silhouette.
- Material references for damage patterns, edge wear, mortar, grain, and color variation.
- Environmental references for terrain, vegetation, weather, depth, and natural light.
- Composition references for focal placement, negative space, and player navigation.
- Gameplay references for cover, sightlines, movement, interaction opportunities, and visual hierarchy.
Create a small reference board with a written annotation for each image. State what you are borrowing at the level of principle, such as “asymmetrical vertical framing” or “subtle moss concentrated at moisture traps,” rather than “copy this building.” This makes the artistic reasoning visible and reduces the risk of producing an unoriginal imitation.
Your final portfolio should include a selection of reference images only when they clarify a decision. A long moodboard without annotations does not show how you turned observation into an environment.
Turn the idea into a blockout that can be built
The blockout is where you test proportion, scale, composition, and modular requirements before committing to polished assets. It should answer practical questions: Can the player understand where to move? Does the main structure dominate the frame? Can repeated pieces support the forms you need? Are focal points visible from likely approach angles?
Work with simple geometry and neutral materials first. Place major masses, adjust camera framing, and check the scene from several distances. Include a scale reference early. A door, railing, stair riser, or character-sized proxy can reveal proportion errors that remain invisible in an empty viewport.
Then classify the blockout by construction needs:
- Unique hero assets require individual modeling and detailed treatment, such as a focal statue or broken arch.
- Modular architectural assets repeat across the scene and should be designed as a coordinated kit.
- Set dressing supports the narrative and composition without becoming the primary silhouette.
- Terrain and foliage shape movement, frame the camera, and connect the built forms to the ground.
Keep the classification visible in your documentation. A screenshot that proves the whole kit is present in the blockout is more useful than a single finished wall. It shows that the environment was designed as a system rather than assembled from unrelated props.
Test the composition before polishing. Move the camera, reduce lighting contrast, and inspect the scene without atmospheric effects. If the scene becomes confusing when dramatic lighting is removed, the underlying spatial hierarchy may be weak. If the camera works only from one angle, identify whether that is an intentional hero shot or a design limitation.
Build a modular kit around a visible system
Modularity is useful when it expresses how the environment was constructed. A credible kit may include wall sections, corners, pillars, trim, roof pieces, stairs, and damaged variants. The exact inventory should follow the concept rather than a universal checklist. The important point is that repeated elements share proportions, material rules, and construction logic while still allowing controlled variation.
Plan the kit around likely combinations. Draw the major forms or create a blockout matrix to see which pieces meet at corners, how openings interrupt a wall, and how damaged variants connect to intact sections. Check silhouette continuity from the intended camera. A perfectly consistent kit can look sterile, while random variation can damage structural logic.
| Kit decision | Question to answer | Useful validation |
|---|---|---|
| Grid and proportions | Will pieces align without visible gaps or accidental scale changes? | Assemble a wall grid and inspect repeated junctions |
| Surface detail | Does detail remain visible at the intended camera distance? | Render neutral lighting at hero and gameplay distances |
| Variation | Can a damaged or alternate piece replace the base without breaking scale? | Swap variants in the same modular position |
| Material separation | Which surfaces need unique maps, and which can share a material family? | Compare draw calls and texture memory in the target scene |
| Gameplay support | Do forms support cover, navigation, traversal, and focal points? | Review the scene with level-design requirements |
Avoid hiding complexity behind a large asset count. The portfolio should show how assets work together. Include a clean asset overview, a few construction views, and an assembled scene. If you used a procedural tool, a graph, or a script, document the input and result rather than presenting the output as an unexplained handmade asset.
Respect engine-ready constraints without letting them dominate the presentation. Clean naming, sensible pivots, controlled topology, and valid material channels make the work easier to maintain. For a specialist role, add detail on lightmap UVs, collision, LODs, instancing, or texture atlases. The relevant technical claims should match what you actually prepared.
Develop materials as controlled surface systems
Materials should communicate the age, construction, and use of the environment. A convincing stone surface is not created by noise alone. It needs a believable base construction, a hierarchy of damage, restrained variation, and a response to the scene lighting.
Begin with a hierarchy of detail. Large forms should establish material identity, medium detail should communicate construction and wear, and fine detail should support close inspection. A wall might combine recessed mortar, irregular brick silhouettes, chipped edges, localized staining, and restrained color variation. Applying every effect at equal strength produces visual noise.
Build each material from a small number of controlled layers:
- A base pattern with believable scale and construction.
- Height or normal information that reflects physical relief.
- Edge wear or damage that responds to exposed surfaces.
- Color variation tied to material behavior rather than random hue changes.
- Dirt, moisture, or staining concentrated in plausible locations.
Compare your material against a reference at matching scale. View it flat, under neutral lighting, and in the final scene. Check it both as a tiling element and within a larger assembly. A material that looks convincing in isolation can fail when repeated across a wall because the pattern repeats too frequently or introduces excessive normal strength.
Document the most instructive part of the process. For an authored material, show a graph, a parameter sheet, a before-and-after comparison, or a sequence explaining how the surface was developed. Include honest notes about trials that failed. A controlled iteration demonstrates judgment, while an unexplained result asks the viewer to assume that every decision was sound.
For trim or smaller assets, distinguish between physically sculpted detail and texture-based detail. A For additional context, portfolio image of damaged masonry benefits from showing which features were modeled, which were authored in a texture tool, and why the split was chosen for the scene and camera.
Light the scene around hierarchy and player guidance
Lighting should support the intended experience, reveal construction, and guide attention. It does not need to be uniformly bright. Dark passages, warm focal lights, and cooler exterior light can create depth, but the contrast must preserve the information the player needs.
Test with a neutral lighting setup before applying the final atmosphere. Check whether the silhouette, path, and focal hierarchy still read. Then design the atmosphere in layers: base light, shadow behavior, color temperature, volumetric depth, and any emissive or practical sources.
Use the camera as a production constraint, not merely a frame for the final render. If one sign, doorway, or pool of light is intended to attract the player, make sure the lighting supports that role. If the scene is meant to feel enclosed, verify that darkness does not erase the modular forms that communicate scale.
Record the lighting decision and its effect. A comparison between a flat preview and the final atmospheric scene is often more informative than a dramatic final image alone. It shows how the artist balanced mood with readability.
Prepare the scene for the engine and the target hardware
A portfolio scene is more credible when it is presented as a game environment rather than a disconnected render. Show the intended camera, include gameplay-relevant scale, and capture the scene in the target engine when possible. The engine view also reveals whether the atmosphere survives under real-time lighting and material limitations.
Performance work should be presented as a set of decisions, not as a promise of universal performance gains. Identify the platform, representative scene, camera path, and quality settings when reporting frame-time observations. Without that context, a screenshot of an FPS counter has little value.
For a junior portfolio, the following checks are usually enough to demonstrate production awareness:
- Apply naming conventions consistently to meshes, materials, textures, and scene folders.
- Check pivots, orientation, scale, collision, and intended material assignment.
- Identify which assets can instance or share materials.
- Inspect texture resolution, compression, mip behavior, and material cost.
- Create an LOD or level-of-detail plan for assets visible at multiple distances.
- Capture representative gameplay views rather than only the most flattering camera.
Use GeForce RTX 5090 DLSS 5 best settings for stable frame pacing as a separate technical resource if you need to compare image quality and frame-pacing choices on specific hardware. Do not present a particular upscaling mode as a substitute for controlling the actual scene cost. Geometry, materials, texture memory, lighting, and overdraw still determine the workload.
If your target project uses a different tool or engine, state that context. Environment artists work across engines and DCC applications, and the transferable skill is the reasoning behind the asset and scene choices, not a claim that every environment should follow the same implementation.
Present the project as a readable case study
The portfolio page should let a viewer understand the project without deciphering the artist’s workflow. A practical sequence is goal, reference, blockout, construction, materials, lighting, engine result, and retrospective. You can compress the sequence, but keep enough decision-making visible for the work to support your application.
Use images for specific evidence. A large final render establishes quality, but it should not carry the entire argument. Pair it with a blockout, an asset grid, a material breakdown, a lighting comparison, and a representative engine capture. Crop images to the point being explained. A clear detail can be more persuasive than a dense collage.
| Portfolio section | What it proves | What to avoid |
|---|---|---|
| Brief and intention | That the artist set a purpose and made deliberate choices | A generic statement about passion or quality |
| Reference and concept | That visual research informed the design | An unexplained inspiration collage |
| Blockout and kit | That scale, composition, and construction were planned | Only a polished end result |
| Materials and assets | That the artist can create controllable production content | Close-ups without context or pipeline |
| Lighting and engine | That the concept survives real-time presentation | A render that does not match the engine build |
| Retrospective | That the artist can evaluate and improve their work | Claims that every step went perfectly |
Write captions that explain the decision. “More atmospheric” is an observation; “the cool exterior value separates the ruin from the fog, while the warm practical light preserves the doorway as the navigational focal point” is design reasoning. Captions should not merely restate what is visible.
Keep the case study readable on a laptop and a phone. Use a clear image order, concise project summaries, and alt text that identifies the relevant stage. Avoid burying the strongest evidence behind long paragraphs or requiring a visitor to open a downloadable file to understand the project.
Build a portfolio set that covers complementary strengths
One strong project can carry much of the portfolio, but a hiring team usually needs more than one proof point. The best supporting pieces fill genuine skill gaps rather than repeat the same environment at a different camera angle.
For an environment-focused applicant, a balanced set might include a modular architectural scene, a material study that solves a difficult surface, a props or set-dressing piece, and a technical optimization case. Each piece needs a different reason to exist.
For example, the main project can demonstrate world building and atmosphere. A prop can prove close-range modeling and material control. A modular exercise can show repetition and construction rules. An optimization comparison can demonstrate the ability to preserve visual intent under runtime constraints. This structure prevents the portfolio from becoming three variations of the same wall.
Depth matters too. A compact set of four well-documented projects is often more useful than a long gallery of unfinished assets. Include a smaller piece if it teaches something the major project cannot. Remove anything that lacks a clear contribution, even if you spent considerable time on it.
For adjacent evidence, the site’s guide to tropical plants in Grow a Garden connects asset implementation to a specific game-design context. Use that kind of example as a reminder that portfolio assets benefit from clear functional context, even when your presentation is not tied to a released game.
Prepare the same work for an art director’s review
A web portfolio and an application package serve different review needs. The web version can provide generous captions, process context, and a flexible image sequence. The downloadable portfolio should be lighter, ordered by relevance, and readable without relying on your website.
Use the same visual identity and accurate project information in both formats. If the PDF is compressed for file size, confirm that images remain legible and the final render is not the only evidence. Remove accidental data such as hidden layers, personal notes, or incorrect engine labels before export.
Ask for feedback from people who can judge the relevant discipline. A concept artist may identify a weak readability problem, while a technical artist may question the material or optimization approach. Separate advice from a demand to revise every preference. The goal is to find information that changes the quality of the presentation, not to collect contradictory suggestions.
Before submission, complete a timed review. Spend five minutes looking at the portfolio as if you were a hiring manager. Can you identify the candidate’s role, primary strength, and evidence for that claim? Can you open a project without hunting for the hero image? Does every image have a reason to exist? If the answer is unclear, the sequence needs work before the scene does.
Use a portfolio checklist before publishing
Review the finished environment artist portfolio as a production artifact, not only as a collection of images. The final check should confirm that the work is legible, technically honest, and relevant to the role being sought.
- Define the role target. State the type of environment work and level you are demonstrating.
- Select one strong project. Give it a clear brief, research rationale, and bounded scope.
- Show spatial planning. Include a blockout, scale reference, and modular assembly.
- Explain material decisions. Show how the surface system was built and tested.
- Present real-time evidence. Capture the target engine and representative gameplay views.
- Document constraints. Note naming, materials, texture choices, LODs, instancing, or performance decisions that apply.
- Write useful captions. Explain what changed, why it changed, and what you learned.
- Remove duplication. Do not publish the same scene multiple times with minor camera changes.
- Test the format. Check captions, image order, file size, and readability on desktop and mobile.
- Proof the facts. Confirm tool names, engine versions, project credits, and technical claims are accurate.
The final portfolio should leave the reviewer with a simple answer: this artist can take an environment from intention to an organized, real-time scene. Make that claim visible in the project selection, process evidence, and final presentation. A smaller set of specific decisions will be more convincing than a larger set of unexplained assets.
Frequently asked questions
How many projects should an environment artist portfolio include?
There is no universal number. A focused portfolio with three or four well-documented projects can be stronger than a large gallery of unrelated assets. Include enough work to demonstrate breadth across your target role, then give each selected project a clear purpose. A major scene, a material-focused asset, a modular exercise, and a technical improvement can cover more relevant evidence than several near-identical environment renders.
Should an environment artist portfolio include concept art?
Include concept material when it demonstrates a decision that affects the environment. A sketch establishing massing, a palette study, or a mood frame can be valuable. An extensive moodboard with no annotations adds little because it does not reveal how you interpreted the references. The portfolio should show how visual research became a spatial, material, and lighting system.
Do I need advanced sculpting and texturing skills for an environment portfolio?
The required depth depends on the role, but strong fundamental execution matters. You should be able to create readable forms, appropriate surface hierarchy, controlled materials, and assets that work at the intended viewing distance. Specialized tools are less important than explaining the choices you made and showing evidence of the result. For a technical or senior role, deepen the relevant production areas such as pipelines, constraints, performance, or team standards.
Should a portfolio show the final render or the gameplay view?
Show both when possible. The final render demonstrates art direction, composition, and detail, while the gameplay view proves that the work functions in a real-time scene. Neither image replaces the other. Include neutral or in-engine captures when they reveal material behavior, lighting, draw structure, scale, or a problem you corrected.
How do I present a portfolio project that was never shipped?
Describe it accurately as an independent study, degree project, prototype, or self-directed scene. Explain the target context, such as a PC real-time environment for a fixed camera or a small interactive scene. Do not imply that it shipped, had a team, or met a commercial production schedule unless those facts are true. Independent work can still demonstrate strong planning and execution when its constraints are explicit.
Should I include all my tools in the portfolio?
List the tools that materially supported the work, but do not let the software list become the main argument. Hiring teams want evidence that you can solve a problem and deliver a usable result. A brief breakdown of how each important tool contributed is more useful than a long inventory of applications.
Is a Unity environment different from an Unreal Engine environment in a portfolio?
The core art pipeline remains transferable, but rendering features, material workflows, lighting behavior, and production constraints differ. State the engine and version family when relevant, and show the scene under its actual engine conditions. If your portfolio is engine-neutral, emphasize the decisions that transfer: proportion, modularity, material response, scale, and scene organization.
How do I choose between a cinematic shot and a natural player view?
Use the natural player view when the role emphasizes gameplay, navigation, optimization, or level integration. Use a cinematic shot when the brief explicitly targets mood, composition, and presentation. You can include both, but label the camera intent so the reviewer understands that each image serves a different purpose. A dramatic camera should not conceal the experience shown in the engine.
What should I put at the top of my portfolio home page?
Place the strongest relevant project first, followed by a short role statement and a clear path into the case study. The viewer should understand your discipline and current level within seconds. Add a concise introduction, then organize the remaining work around the evidence you need to provide. Do not begin with a long autobiography or a set of thumbnails without context.
How should I handle client or confidential work in a portfolio?
Show only what you are permitted to publish, and identify restricted work as confidential when appropriate. You can explain your responsibility, constraints, and decisions without exposing unreleased assets, proprietary information, or work belonging to another artist. A clear case study of a process you created yourself can often support the same skill when client material cannot be shown.


Leave a Reply