
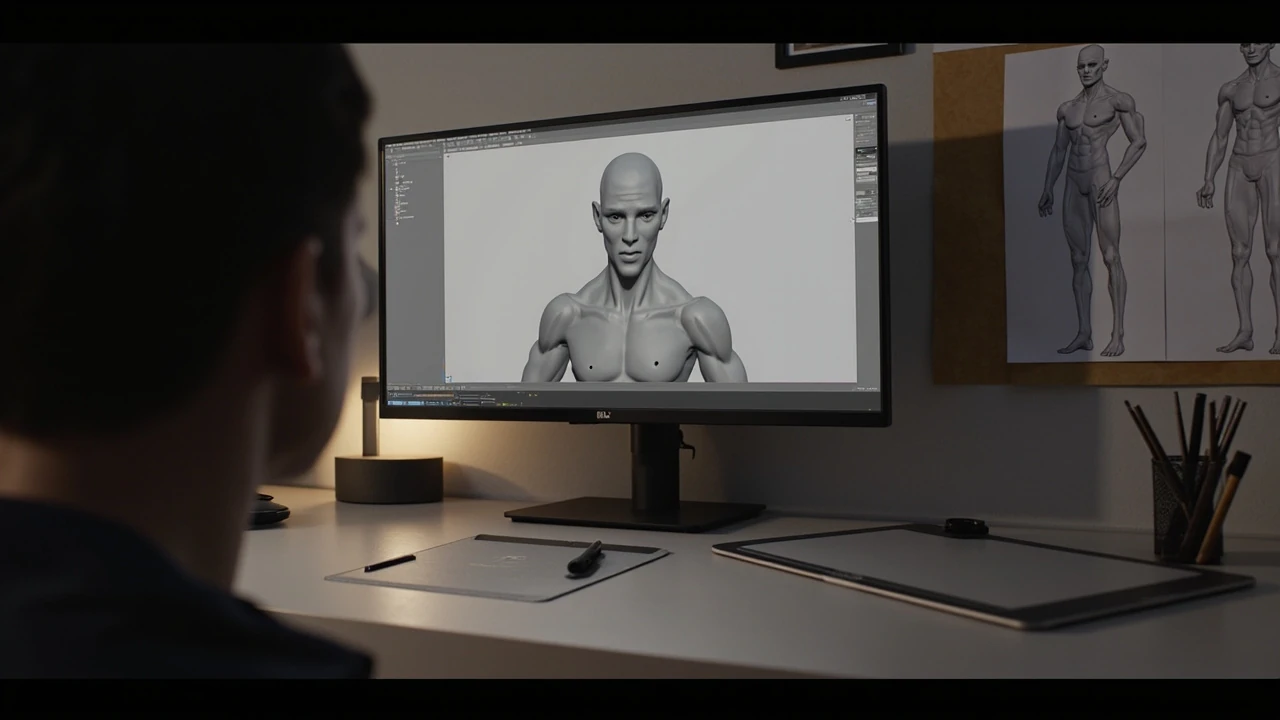
How to build a 3d character for a game production pipeline
A game character can look convincing in a still render and still fail as a playable asset. The silhouette may be memorable, but dense topology, stretched UVs, missing material properties, or an untested rig can prevent the model from animating or running efficiently in the game engine. A reliable 3d character therefore begins with production constraints, not with the highest-detail sculpt.
The practical workflow is to move from visual intent to an engine-ready asset while preserving a clear chain of decisions. Define the character’s role, build a readable design, establish large forms, prepare geometry for deformation, create the material system, rig the character, test it in motion, and package it for the target platform. Each stage has a deliverable and a validation step, so feedback arrives before expensive work has compounded.
This guide focuses on game production rather than character illustration alone. The goal is a 3d character that communicates clearly, survives animation, fits the project’s art direction, and can be imported, shaded, and evaluated under realistic engine conditions. A more detailed overview of the design stages appears in this guide to mastering 3D character design, which provides useful background for this point.
Start with the character’s production brief
A useful brief answers five questions before modeling begins: what the character does, how the player sees them, how they move, which assets they share, and what performance limits apply. Without those answers, artists may optimize details that the camera never sees while leaving visible transitions, hair, clothing, or facial deformation unprepared.
For a player-facing character, describe the camera distance, typical lighting, and expected expression range. For a non-player character, note whether the camera sees the full body, whether dialogue requires facial animation, and how often the asset appears on screen. For creatures or background characters, identify which animation features must be supported and which can be simplified.
The brief should also separate visual requirements from engine requirements. A costume may need layered materials in the concept, but the runtime may permit only two shader slots. A character may carry a prop that must be swapped or removed on the GPU. A cloak may need cloth simulation during authoring but a baked animation in the shipped build. These constraints need to be explicit because visual intent cannot be judged without a delivery context.
| Brief question | Decision to record | Effect on the asset |
|---|---|---|
| How prominent is the character? | Full-body hero, close-up dialogue subject, or background figure | Determines face, costume, topology, and texture priorities |
| What must animate? | Facial expression, cloth, accessories, weapons, or full body | Sets rig, joint, and material requirements |
| Where does the character appear? | Menu, dialogue scene, combat, traversal, or distant environment | Sets LOD, lighting, and texture-resolution expectations |
| What can be shared? | Skeleton, material, texture atlas, or modular costume pieces | Influences naming, pivots, and source-control organization |
| What are the platform limits? | Triangle, texture, memory, draw-call, and animation budgets | Prevents a display model from becoming a production problem |
Record these decisions in a short production document and attach concept approvals, reference material, target engine, animation needs, and known exclusions. When feedback changes later, the team can distinguish a new creative requirement from a missed constraint. That is especially useful for a character whose final silhouette, body proportions, or costume changes after a rig or texture pass has begun.
Turn the concept into a readable silhouette
The strongest game-ready designs remain recognizable at gameplay distance and under partial lighting. Before committing to surface detail, test the overall proportions, head-to-body relationship, pose, costume mass, and gesture. If the character reads as an indistinct humanoid at the target camera distance, adding pores, fabric grain, or small accessories will not solve the problem.
Begin with references rather than with a software-specific sculpt. Useful reference sets can include anatomy, costume construction, facial structure, posture, and material wear. Collect enough information to answer specific questions, such as how a shoulder joint is concealed by clothing or which material behaves differently from leather. A mood board is useful for direction, but the final design still needs structural and material logic.
Generate many small silhouette studies. Change stance, head size, limb length, body mass, and prop placement while keeping the same central idea. A practical exploration sequence is:
- Draw the character as a solid black shape without interior detail.
- Reduce the drawing until only the outer contour remains.
- Check whether the head, torso, limbs, signature prop, and stance can still be identified.
- Compare versions at the intended gameplay scale.
- Select a direction for proportion and readability before surface refinement.
The best silhouette is not simply unusual. It should support the character’s function. A heavy worker may need broad, grounded shapes, while a fast acrobat may benefit from a compact torso and long limbs. Armor can conceal anatomy, but the body underneath still needs believable weight transfer and joint construction. Silhouette exploration gives the team a way to discuss these choices before the model becomes expensive to change.
At this stage, lock the elements that have broad downstream effects. Major proportions, hand and foot construction, hair or head volume, clothing layers, signature accessories, and attachment points deserve approval. Small surface ideas can remain flexible. A practical concept review can use a table to separate decisions by impact:
| Design element | Downstream dependency | Review priority |
|---|---|---|
| Overall proportions | Silhouette, topology, deformation, costume fit | Lock before detailed sculpting |
| Face and head volume | Facial rig, expression range, close-up materials | Lock before facial topology work |
| Hair or headwear | Card shapes, strand assets, collisions, material setup | Approve volume and construction |
| Signature prop | Attachment bone, socket, collision, gameplay logic | Confirm attachment and handling |
| Surface wear | Texture channels, material masks, baking cost | Can be refined after structure |
Block the body with large forms
Blocking converts the approved design into a three-dimensional proportion study. Use simple forms to establish the torso, limbs, head, major costume masses, and balance. At this point, resist small sculpt details such as pores, wrinkles, seams, or tiny ornaments. Their value depends on the underlying form being correct.
Build the body in a neutral, useful pose rather than an extreme presentation pose. A neutral pose makes proportion errors easier to see and gives the retopology and rig stages a more stable starting point. If the concept includes a pronounced stance, create a separate pose or pose reference after the base proportions are established.
Check the character from several directions:
- Front and back views to compare limb width, shoulder balance, and symmetry.
- Side views to assess head projection, chest depth, abdomen shape, and foot placement.
- Three-quarter views to test the features most likely to appear in gameplay.
- A small thumbnail to evaluate silhouette and visual hierarchy.
- A neutral front view to confirm the eyes, nose, mouth, and ear placement.
Pay attention to the relationship between anatomy and clothing. A jacket should not simply float above the torso, and boots should not hide a foot that appears to lack weight. Volume can be stylized, but the body should read as if it could support the costume and the intended action. For exaggerated proportions, decide which rules you are changing deliberately. Long arms may be expressive, but they still need predictable joint placement for animation and IK.
Once the large forms read correctly, add secondary anatomy such as muscle groups, joint masses, facial planes, and garment volumes. Fine detail comes later. A useful discipline is to ask whether a feature changes the pose, silhouette, material behavior, or character identity. If it does none of those, it may not justify the production cost.
Prepare the mesh for deformation
A game character mesh must satisfy two different needs. It must look controlled in the rest pose and deform cleanly when animated. Retopology creates a lower-resolution, structured surface intended for rigging and real-time use. It does not need to reproduce every sculpt mark, but it must preserve the intended silhouette and important facial or costume forms.
Topology decisions should follow the deformation required by the animation. Areas that bend sharply or change shape under facial controls need deliberate edge flow. Broad surfaces, such as the back of the skull, may tolerate more generous loops. Cloth, armor, and skin can be separate shells when they need different material response, collision, or animation behavior.
For a production asset, inspect the mesh for several common faults:
- Vertices trapped in narrow crevices that can collapse during deformation.
- Triangles or stretched edges crossing the face, joints, or major body masses.
- Uneven density that adds cost without supporting shape.
- Loose geometry that creates gaps when the character bends.
- Overlapping shells that z-fight or collide during motion.
The exact density cannot be chosen from a universal triangle target. A hero face, a dense costume, a body mesh, and a background prop have different requirements. Use a representative animation set to identify where topology causes visible failure. A still inspection can reveal stretched normals, but movement exposes pinching, joint collapse, clothing intersections, and volume loss.
Keep the high-resolution sculpt as an art source rather than the real-time deliverable. Store the working sculpt, retopologized production mesh, UV layout, texture files, rig, and reference images under clear names. Source control and version control become especially important because a rig change can require new weight painting or deformation fixes, while a texture change can require updated bakes and masks.
Unwrap UVs for controlled texturing
UV mapping converts the mesh into a two-dimensional layout for painting or image-based texturing. A good layout supports readable texel density, minimizes distortion, and leaves enough room for the masks and variants the material system needs. The objective is not merely to avoid overlap. It is to make later texture work predictable.
Plan the layout around major material regions and deformation. Face areas, clothing panels, armor plates, and high-wear surfaces may need separate space. A repeated pattern such as quilting or mesh should align with the form rather than stretching across it. Smaller details can share an atlas, but seams and mirrored parts should be considered deliberately.
Texture resolution should reflect on-screen importance. A close-up face usually needs a different texel budget from a distant body surface. Texture size is not a direct quality score: the useful measure is whether the image remains stable under the target camera distance, lighting, and compression. Excessive density creates authoring and memory costs, while insufficient density produces visible softness or texture breakup.
Validate the UVs through several checks:
- Inspect the unwrapped mesh at full scale for overlaps outside intentional mirrored areas.
- Test the projected checker pattern for stretching and pinching.
- Confirm that seams fall in visually acceptable locations.
- Check that facial and costume details have enough texel density.
- Export the layout and test it in the target engine or texture toolchain.
Texture authoring should happen after the production mesh is stable enough to bake against. Painting directly onto an unstable mesh can waste work because the projection changes when topology is revised. Normal, roughness, metallic, height, ambient-occlusion, and mask data may also need separate bakes, depending on the material system. The required maps are engine and shader decisions, not universal constants.
Build a material system that matches the design
Texturing defines the visible marks on the character, while the material shader defines how those marks respond to light. Skin, fabric, leather, metal, plastic, hair, and painted surfaces do not share the same roughness, reflectivity, or highlight behavior. A convincing result depends on both the image detail and the properties used to interpret it.
Start by grouping surfaces by behavior rather than by color. Two parts may share a base color but need different roughness. Another surface may use a fabric appearance in the material preview but require a different setup in the engine. Document the intended response, especially where it affects recognition, such as the bright rim of metal armor, the broad highlight on leather, or the soft falloff on skin.
A useful material review compares these dimensions:
| Surface | Visual evidence | Material property to test | Common failure |
|---|---|---|---|
| Skin | Subtle color variation and controlled highlight | Roughness, normal strength, subsurface treatment if used | Waxy or uniformly glossy skin |
| Fabric | Woven grain, seams, folds, restrained reflection | Roughness, normal detail, optional sheen | Metal-like shine or soft-looking weave |
| Leather | Creases, edge wear, broad surface variation | Roughness variation, normal detail | Uniform gloss that erases material separation |
| Metal | Sharp highlights, seams, scratches | Metallic value, roughness, reflection setup | All metals share the same apparent material |
| Hair or fibers | Directional structure and silhouette | Alpha or strand method, masking, transparency | Scalp-like plane and unstable sorting |
Test materials under controlled lighting and against the character concept. A neutral studio viewport can conceal issues that become obvious in the game’s environment. Check the face under soft light, metal under a strong key, fabric in shadow, and transparent hair from the target camera angle. If the character appears in many environments, create a repeatable lighting set for reviews and compare every material revision against it.
For a beginner or small team, learning a coherent pipeline in one general-purpose tool can be more useful than collecting disconnected software skills. The broader guide on character design, visual identity, and team workflow provides a useful example of how a strong concept language can guide several disciplines, although the technical asset process still needs a separate asset brief.
Rig the character around the required motion
Rigging creates a control structure that lets an animator pose and animate the mesh. The rig should reflect how the character moves. A human character requires a body hierarchy, skeletal joints, deformation weights, and often facial controls. A creature may use a different skeleton, while a rigid or mechanical character can use a mix of segmented parts and weighted regions.
Design the skeleton around the animation contract. Confirm whether the character requires IK, foot planting, hand interaction, weapon use, cloth, accessories, facial speech, or blended shapes. These requirements influence joint placement, bone count, control naming, attachment points, and the number of poses that must be authored. A skeleton that solves a general humanoid pose may still fail when the character grips a specific prop or sits in a vehicle.
Weighting should follow the deformation brief. Joint bends need enough influence to move smoothly without collapsing. Cloth and armor should retain volume. Hard surfaces should preserve their shape unless the design requires visible flex. The most common weighting errors appear when a single influence covers too broad a region or when nearby surfaces receive insufficient separation.
A production rig needs more than a successful preview pose. Test it in a controlled set:
- Check the rest pose against the approved sculpt and concept.
- Test extreme joint bends while watching for collapsed areas.
- Move facial controls through the required expression range.
- Pose hands and feet against common ground and prop positions.
- Check that accessories follow the correct attachment bone.
- Export the skeleton and animation to the engine under the project’s naming rules.
Control names should describe intended actions rather than generic locations where possible. Consistent naming helps animators, technical artists, and programmers exchange assets. This matters most when the rig must connect to gameplay systems such as equipment sockets, ability targeting, facial controls, or physics constraints. The rig and gameplay contract should be reviewed together before production animations depend on them.
Optimize the asset without flattening its identity
Optimization means reducing avoidable cost while preserving the information the player and camera need. It does not mean applying a triangle reduction tool and accepting every automatic result. The correct reductions depend on camera distance, animation, material behavior, platform budget, and the importance of the character.
Visual detail can move between representations. Dense geometry may become a normal map, baked hair cards may replace individual strands, or a close-up texture may retain detail that a lower LOD does not need. These substitutions change cost in different systems, so inspect frame time, memory, draw calls, and animation complexity rather than treating one number as a complete performance verdict.
Begin with a representative development build on representative hardware. Record the baseline before making reductions. Then change one category at a time:
- Reduce over-dense mesh regions and confirm that silhouette and deformation remain intact.
- Create LODs for expected viewing distances and compare transitions.
- Reconsider material count, texture resolution, and shader complexity.
- Inspect transparency sorting, overdraw, and hair or particle costs.
- Profile skinned-mesh behavior with the animations used in gameplay.
- Test memory and loading behavior with the character present in representative scenes.
The engine may display several warning types for a character asset. A missing material assignment is straightforward, but excessive skin weights, unsupported vertex formats, invalid tangents, missing textures, or scale problems can affect the entire asset. Fix import errors before judging visual quality. A technically invalid file can look correct in a DCC tool and fail in the engine.
Keep the source model intact. Optimization should produce a new engine-facing version or a clearly named derivative, with the relationship documented. This allows the team to compare the optimized result against the approved design and recover lost detail without rebuilding the entire character.
Validate the complete character in the engine
The final validation environment is the game engine with the real material, animation, camera, lighting, and scale. A character that passes every individual stage may still fail when imported. The most common integration problems come from mismatched scale, rotated axes, incorrect root placement, missing socket transforms, shader differences, or animations that rely on conventions the game does not use.
Use an import checklist and assign responsibility for each result:
| Validation | What to inspect | Acceptance signal |
|---|---|---|
| Import | Meshes, materials, textures, skeleton, animation clips, scale | No errors or missing references |
| Rest alignment | Root height, forward axis, proportion, ground contact | Character matches approved design and project scale |
| Material | Base color, normal, roughness, metallic, alpha | Surface response matches the review reference |
| Animation | Bone mapping, controls, root motion, clip timing | Clips play as intended without retargeting defects |
| Gameplay | Attachments, sockets, collisions, queries, LOD behavior | Equipment and character systems use the asset correctly |
| Performance | Draw calls, memory, shader cost, skinning, overdraw | Result fits the agreed budget on target hardware |
Place the character in representative scenes. Test a close dialogue camera, normal gameplay distance, strong and weak lighting, and a scene containing similar materials or silhouettes. Check animation at high and low framerates, because procedural systems may depend on frame time. Also test transitions, such as entering gameplay from a menu, changing equipment, or appearing after a loading operation.
Capture a reference set before sign-off. Front, side, three-quarter, facial close-up, material close-up, and a short turntable or animation sequence make later comparisons precise. Record the engine version, import settings, material configuration, and known limitations. A sign-off should mean that visual, technical art, animation, and engineering have each checked the areas they own rather than relying on one general approval.
Prepare a clean handoff and version the decisions
A handoff is part of the asset, not a final email attachment. Another artist should be able to identify the source files, understand the asset’s approved scope, locate the production mesh, and reproduce the import or material setup. Naming conventions should distinguish concepts, working files, source assets, and engine exports.
A practical package can include:
- Approved concept images and turnaround references.
- The high-resolution sculpt and retopologized production mesh.
- Final UV layout and texture source files.
- Texture exports at the agreed resolutions and color-space settings.
- Rig files, control notes, and exported skeleton data.
- Animation preview clips and any required reference poses.
- Engine exports, import presets, material settings, and validation captures.
- A short change log covering approved modifications and unresolved issues.
Use version control for files that require review, and store large binaries in the project’s approved asset repository. A commit message should identify the stage and reason for a change, such as a topology correction for elbow deformation or a texture update for cloth roughness. Avoid filenames that make only the latest revision obvious. A short, readable history is usually more valuable than a perfectly descriptive but inconsistent naming scheme.
Define review gates. The concept gate confirms identity and proportions. The sculpt gate confirms form and detail. The topology gate confirms deformation readiness. The material gate confirms surface response. The rig and engine gates confirm motion and integration. Each gate should have a named owner and a decision artifact. This prevents a production issue from being discovered during final content lock, when changes are most expensive.
Common failures and where they originate
Most character problems are not mysterious rendering defects. They are decisions made too late or without a validation step. The table below maps common symptoms to likely causes and useful checks.
| Symptom | Likely origin | Useful diagnostic |
|---|---|---|
| Face twists when speaking | Topology, weights, or facial controls are not aligned with the intended deformation | Test each control independently and inspect the rest pose |
| Clothing intersects the body | Volume, collision, or animation support was not considered | Review the character in the required animation range |
| Texture looks stretched | UV distortion or incorrect normal-map tangents | Inspect checker projection and engine tangents |
| Hair flickers | Transparency sorting, alpha coverage, or card construction | Test from gameplay camera angles with scene geometry nearby |
| Character is too expensive | Unplanned geometry, materials, transparency, or overdraw | Profile the representative build before changing assets |
| Animation plays in the wrong place | Root transform, axes, scale, or import convention differs | Compare engine and DCC transforms at frame zero |
| Detail disappears in motion | The model relies on view-dependent surface detail | Review the final mesh and texture under gameplay lighting |
Fix problems at the earliest responsible stage. Changing topology can invalidate bake coordinates and weights. Changing a material can conceal a modeling error but increase shader cost. Increasing texture resolution can sharpen a texture while leaving an incorrect normal map intact. Diagnosis should therefore establish which layer owns the visible problem before remediation begins.
A practical production sequence for a game character
The complete workflow can be reduced to a repeatable sequence with clear outputs. This sequence assumes a conventional rigged character, but the same decision structure applies to many creatures and non-player assets.
- Brief the asset: Record role, camera visibility, animation needs, shared assets, engine, and platform limits.
- Approve the concept: Test silhouette, proportions, material cues, costume construction, and signature identity.
- Block the model: Establish large forms, proportion, balance, costume volume, and neutral pose.
- Refine the sculpt: Add anatomy, facial planes, garment structure, and selected secondary details.
- Retopologize: Build a deformation-ready mesh and validate it against required movements.
- Create UVs: Plan seams, texel density, overlaps, padding, and required mask space.
- Author materials: Paint or generate the maps and configure surface behavior for the target renderer.
- Rig and weight: Build the skeleton, controls, deformation, and attachment points required by production.
- Optimize: Create appropriate LODs and reduce avoidable geometry, material, and texture cost.
- Import and validate: Test the full asset in the engine against visual, animation, gameplay, and performance criteria.
- Package and version: Archive source files, engine exports, references, and a concise decision history.
Use this sequence as a dependency map rather than a rigid schedule. Concept research, sculpting, UV work, texturing, rigging, and technical preparation can overlap, but each should have an agreed input before the next makes irreversible assumptions. The key is to preserve the link between creative intent and technical validation.
Frequently asked questions
What is the first step in creating a 3d character for a game?
Define the production brief before choosing a software stack. Establish the character’s role, camera visibility, expected animation, required equipment, target engine, and performance limits. The concept should then be evaluated for silhouette and proportions, because both affect every later stage.
Do I need to know how to draw to make 3D characters?
Drawing knowledge is helpful, but a production character can be built with a combination of reference analysis, sculpting, 3D problem solving, and technical art skills. Artists still need to communicate proportion, shape, costume, and material ideas. If drawing is weak, practice shape construction and proportion while learning the 3D pipeline rather than treating drawing as a prerequisite for every modeling decision.
Should a game character be sculpted at high resolution?
High-resolution sculpting can capture useful forms and details, but the real-time deliverable generally needs a controlled production mesh. The high-resolution sculpt can remain the source for baking, shape inspection, or close-up assets. The production mesh should be evaluated for topology, deformation, and engine cost rather than simply copying the sculpt’s polygon count.
How many triangles should a game character have?
There is no universal triangle count for a 3d character. The relevant budget depends on camera distance, platform, animation, materials, number of characters on screen, and the project’s technical target. Start from a representative build, measure the observable cost, and make reductions that preserve the character’s visual and functional requirements.
Is retopology required for every character?
Not every character needs a hand-built high-detail production mesh. Some workflows rely on automated or mixed retopology, while simple background characters may use lower-complexity solutions. Some form of production geometry is still needed for reliable deformation, material assignment, export, and engine control. The required topology depends on how the asset will move and render.
Can one texture atlas be used for an entire character?
Yes, if the layout preserves sufficient texel density, minimizes visible distortion, and leaves room for required maps and masks. A single atlas can simplify material management, but it may create seams, waste texture space, or make individual material updates difficult. Test the complete layout before committing to it.
Should a character be rigged before texturing?
Neither order is universally correct. A stable production mesh and UV layout should exist before final baking, while the rig should exist before deformation and animation validation. These tasks often overlap. The key is to avoid painting or baking against geometry that is still changing, and to test deformation before the asset is treated as final.
How do I know whether a character is ready for the engine?
It should import without missing references, match the project’s scale and orientation, use the required materials, play its animation clips, expose needed attachments, and meet the agreed performance budget. Final sign-off also requires review under representative lighting, camera distances, and gameplay conditions rather than only in the modeling tool.
What should I include in a 3D character portfolio?
Show a small number of completed projects with clear front, side, and three-quarter views. Explain your role and include evidence of concept thinking, sculpting, topology, UVs, texturing, rigging, and final presentation. A turntable or short animation can demonstrate deformation, while breakdowns of technical decisions are more useful than a gallery of unrelated final renders.





Leave a Reply